Cream Puffs with Mom’s Celebrated Filling – Light, Creamy, and Irresistible
The Best Homemade Cream Puffs Recipe
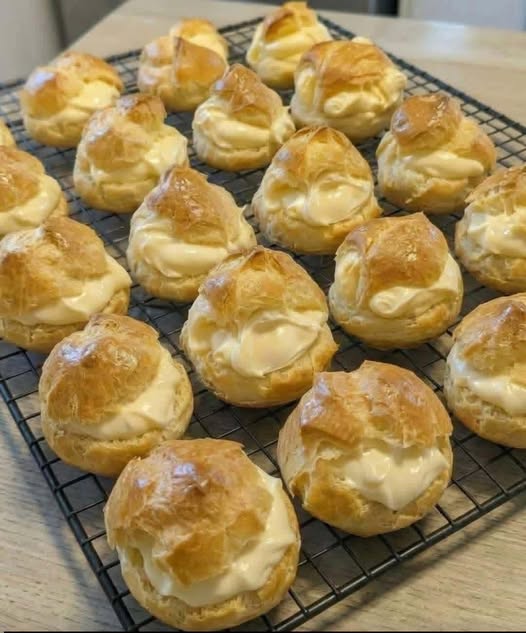
Cream puffs are one of the most elegant and comforting desserts you can make at home. Their crisp golden shells and rich creamy centers create the perfect balance of texture and flavor. Moreover, this classic recipe uses simple ingredients while delivering bakery-style results.
Mom’s celebrated filling makes these cream puffs extra special. The fluffy vanilla cream tastes light, smooth, and perfectly sweet. Meanwhile, the airy pastry shells stay delicate and buttery.
Whether served at parties, holidays, or family gatherings, these homemade cream puffs always disappear quickly.
Why You’ll Love These Cream Puffs
This easy cream puff recipe is both impressive and beginner-friendly.
- Light and airy pastry shells
- Rich and creamy vanilla filling
- Perfect for celebrations and holidays
- Simple pantry ingredients
- Easy make-ahead dessert
- Elegant bakery-style presentation
- Customizable with different flavors
- Delicious with chocolate drizzle or powdered sugar
Additionally, these cream puffs taste even better when chilled before serving.
Flavor and Texture Profile
These homemade cream puffs feature crisp golden exteriors with soft and hollow centers. Meanwhile, the creamy vanilla filling adds smooth richness without feeling too heavy.
The buttery pastry pairs beautifully with the fluffy filling. Furthermore, a dusting of powdered sugar creates a classic bakery finish.
Every bite feels light, creamy, and incredibly satisfying.
Ingredients for Cream Puffs
For the Pastry Shells
- 1 stick butter
- 1 cup water
- 1 teaspoon vanilla extract
- 1 cup all-purpose flour
- 4 eggs
For Mom’s Celebrated Filling
- 2 cups heavy cream
- 1 package instant vanilla pudding mix
- ⅓ cup milk
Kitchen Equipment Needed
Prepare these tools before starting:
- Medium saucepan
- Wooden spoon
- Mixing bowl
- Hand mixer or stand mixer
- Baking sheets
- Parchment paper
- Piping bag or spoon
- Serrated knife
How to Make Homemade Cream Puffs
Step 1: Preheat the Oven
Preheat your oven to 400°F (200°C).
Next, line baking sheets with parchment paper for easier cleanup.
Step 2: Prepare the Dough
In a saucepan, combine:
- Water
- Butter
- Vanilla extract
Bring the mixture to a boil over medium heat.
Then add the flour all at once. Stir constantly until the dough forms a smooth ball and pulls away from the pan sides.
Step 3: Cool the Dough Slightly
Remove the saucepan from heat.
Allow the dough to cool for about 5 minutes before adding eggs.
This step prevents the eggs from cooking too quickly.
Step 4: Add the Eggs
Beat in the eggs one at a time.
The dough should become smooth, glossy, and thick. Additionally, it should hold its shape when scooped.
Step 5: Shape the Cream Puffs
Drop tablespoon-sized portions onto the prepared baking sheets.
For cleaner shapes, use a piping bag with a round tip.
Leave enough space between each puff because they expand significantly while baking.
Step 6: Bake Until Golden
Bake for approximately 40 minutes.
The cream puffs should look golden brown and feel hollow when tapped gently.
Avoid opening the oven door during baking because sudden temperature changes can cause collapsing.
Step 7: Prevent Deflating
After baking, poke each puff carefully with a toothpick.
Then return them briefly to the warm oven with the door slightly open.
This allows steam to escape and helps keep the shells crisp.
How to Make Mom’s Celebrated Filling
Step 1: Combine the Ingredients
In a mixing bowl, combine:
- Heavy cream
- Instant vanilla pudding mix
- Milk
Beat until thick, fluffy, and smooth.
The filling should hold soft peaks while remaining creamy.
Step 2: Chill the Filling
Refrigerate the filling for at least 15 minutes before assembling.
This improves both texture and flavor.
Assembling the Cream Puffs
Slice each cooled puff in half horizontally.
Next, pipe or spoon the filling generously into the bottom half.
Place the top half back on carefully.
Finally, dust with powdered sugar or drizzle melted chocolate on top.
Expert Tips for Perfect Cream Puffs
Use Proper Dough Consistency
The dough should appear glossy and thick. However, if it feels too stiff, add a tiny splash of water.
Do Not Open the Oven Early
Opening the oven too soon releases heat and may cause flat puffs.
Cool Completely Before Filling
Warm shells can melt the filling quickly.
Use Heavy Cream Cold
Cold cream whips faster and creates fluffier filling.
Delicious Cream Puff Variations
Chocolate Cream Puffs
Add melted chocolate to the filling or drizzle chocolate sauce over the tops.
Strawberry Cream Puffs
Fold chopped fresh strawberries into the cream filling.
Coffee-Flavored Filling
Mix instant espresso powder into the pudding mixture.
Caramel Cream Puffs
Drizzle warm caramel sauce over assembled cream puffs.
Storage Instructions
Refrigerator
Store filled cream puffs in an airtight container for up to 3 days.
Freezer
Freeze unfilled pastry shells for up to 2 months.
Thaw completely before filling and serving.
Frequently Asked Questions
Why Did My Cream Puffs Collapse?
Underbaking or opening the oven early usually causes collapsing.
Can I Make Them Ahead of Time?
Yes. Bake the shells ahead and fill them before serving.
Can I Use Homemade Custard Instead?
Absolutely. Pastry cream or custard filling works beautifully.
Do Cream Puffs Need Refrigeration?
Yes, filled cream puffs should stay refrigerated because of the dairy filling.
Final Thoughts on Cream Puffs with Mom’s Celebrated Filling
These homemade cream puffs combine crisp pastry shells with luscious vanilla filling for a truly unforgettable dessert. Moreover, the recipe feels elegant while remaining surprisingly simple to prepare.
The airy texture, creamy filling, and buttery flavor make these pastries perfect for holidays, parties, or weekend baking. Meanwhile, the endless filling variations allow you to customize them for any occasion.
Serve these classic cream puffs chilled with powdered sugar or chocolate drizzle for a bakery-quality dessert everyone will love.