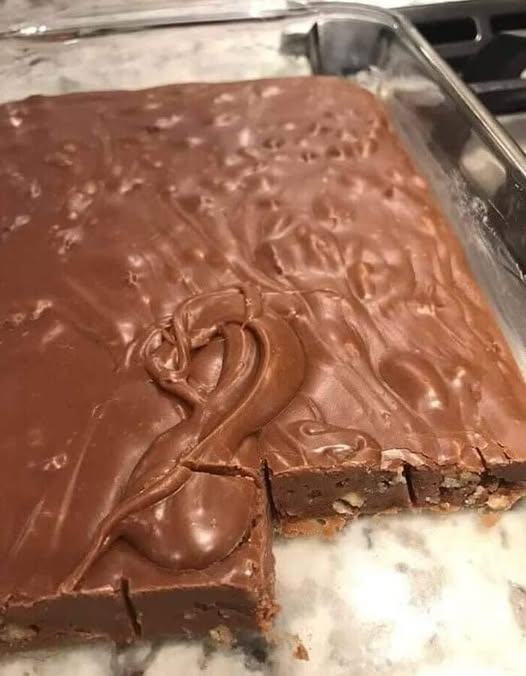
My Mom’s Fudge – A Classic Family Recipe Full of Love
There are recipes that fill your heart long before they fill your stomach — and My Mom’s Fudge is one of those. It’s not just chocolate and sweetness; it’s memories stirred into every glossy swirl, the laughter echoing in the kitchen, and the smell of cocoa that announces something magical is about to happen. This recipe is pure nostalgia — a dessert that defines family, comfort, and love in every square.
Why This Fudge Recipe Is So Special
Every family has a dessert that carries its legacy. For us, this fudge recipe is the embodiment of home. Passed down through generations, it’s stood the test of time — simple, foolproof, and consistently delicious. Unlike complicated confections that demand thermometers and perfect timing, this fudge gives you luxury flavor without the stress. It’s approachable for beginners and deeply satisfying for seasoned bakers alike.
The secret lies in the balance of texture and flavor — a smooth, melt-in-your-mouth richness that never feels heavy. You’ll savor the deep chocolate essence mingling perfectly with creamy sweetness. Whether it’s for Christmas, birthdays, or a random Tuesday, this fudge brings joy to every occasion.
Reasons to Love My Mom’s Fudge
- Silky, smooth texture that melts beautifully on your tongue
- Rich, deep chocolate flavor balanced with just the right amount of sweetness
- Simple ingredients — no need for fancy baking supplies
- No candy thermometer required, making it stress-free
- Perfectly versatile for holidays, gifts, or an indulgent midnight treat
What Does It Taste Like?
Imagine the sensation of chocolate velvet melting on your tongue, with each bite wrapping you in warmth and sweetness. It’s indulgent, but never overpowering. The flavor is balanced — rich enough for a true chocolate lover, yet light enough to keep you reaching for another piece. The texture is creamy and smooth, with that slight firmness that makes a perfect square of fudge so satisfying to bite into.
Benefits of This Classic Fudge Recipe
Aside from its unbeatable flavor, this recipe is practical. It’s designed for real life — busy days, holiday rushes, and last-minute gatherings.
- Quick to make: Ready in under 20 minutes, plus chilling time
- Stays fresh for days: Keeps beautifully for gifting or snacking all week
- Customizable: Add nuts, peppermint, or even swirl in peanut butter
- Budget-friendly: Uses basic pantry staples you already own
- No special equipment needed: Just a saucepan and a spatula
Ingredients You’ll Need
To create this timeless treat, gather the following:
- 3 cups semisweet chocolate chips – for that rich, smooth chocolate base
- 1 can (14 oz) sweetened condensed milk – the creamy, luscious binder
- ¼ cup unsalted butter – adds silkiness and depth
- 1 teaspoon pure vanilla extract – enhances the chocolate flavor
- Pinch of salt – brings out the sweetness and balances every bite
These few ingredients come together to make a masterpiece of simplicity and flavor.
Essential Tools for Perfect Fudge
Making fudge doesn’t require much — just a few reliable tools and some patience as it cools.
- Medium saucepan for melting and mixing
- Wooden spoon or silicone spatula for stirring smoothly
- 8×8-inch baking pan for setting the fudge
- Parchment paper to lift the fudge easily once set
- Sharp knife to cut perfect squares
Pro tip: Line your pan with parchment paper so that the edges hang over — this makes it easy to lift the fudge out once it’s firm.
Step-by-Step Instructions: How to Make Mom’s Classic Fudge
- Prepare the pan: Line your 8×8-inch baking pan with parchment paper. Lightly grease the paper if desired.
- Melt the ingredients: In a medium saucepan over low heat, combine the chocolate chips, sweetened condensed milk, and butter. Stir constantly until the chocolate and butter are completely melted and smooth.
- Add flavor: Remove from heat, then stir in the vanilla extract and pinch of salt. Mix well until fully incorporated.
- Pour and set: Spread the mixture evenly into the prepared pan, smoothing the top with your spatula.
- Cool: Let the fudge cool at room temperature for about 2 hours, or refrigerate for 1 hour for quicker results.
- Cut and serve: Once firm, lift the fudge out of the pan using the parchment paper and cut into squares.
That’s it — creamy, dreamy fudge made in minutes and ready to share.
Additions & Substitutions for Every Taste
The beauty of this recipe is its adaptability. Whether you like a little crunch, a hint of holiday cheer, or a nutty twist, there’s room to make it your own.
- Nut Lovers: Stir in 1 cup of chopped walnuts or pecans before spreading into the pan.
- Festive Flair: Sprinkle crushed peppermint candy on top before cooling for a seasonal touch.
- Dairy-Free Delight: Substitute coconut condensed milk and dairy-free chocolate chips for a vegan version that’s just as rich.
- Extra Indulgence: Swirl in a few tablespoons of peanut butter or caramel sauce for a layered, decadent finish.
Each variation keeps the soul of the recipe intact while adding a new twist to love.
Storage Tips to Keep Fudge Fresh
To maintain its creamy texture, store the fudge in an airtight container. It keeps beautifully at room temperature for up to a week, or in the refrigerator for up to two weeks. For longer storage, freeze in a sealed container for up to three months — just thaw at room temperature before serving.
Pro tip: Wrap individual squares in wax paper for an easy, elegant way to gift or pack them for lunch treats.
Perfect Gift Idea for Every Occasion
Homemade fudge makes for a heartfelt, delicious gift. Package it in festive tins, small jars, or boxes lined with parchment paper. Tie with a ribbon and add a handwritten note — it’s the kind of thoughtful touch that never fails to bring a smile. Whether it’s Christmas, birthdays, or simply to say “thank you,” this fudge carries the sweetness of home wherever it goes.
Tips for Making the Best Fudge Every Time
- Use good-quality chocolate chips – they’re the star ingredient.
- Don’t overheat the mixture – melt slowly over low heat for a silky texture.
- Stir constantly to prevent burning or graininess.
- Let it set fully before cutting — patience pays off with perfect, clean squares.
- Experiment with toppings like sea salt, nuts, or sprinkles for visual appeal and texture.
Follow these tips, and your fudge will always be smooth, creamy, and irresistible.
A Sweet Slice of Nostalgia
Every time we make this fudge, we’re reminded that recipes aren’t just instructions — they’re stories. This one tells a story of warmth, family, and the joy of simple pleasures. The rich aroma of melting chocolate, the first taste that melts on your tongue, and the shared smiles across the table — that’s what makes My Mom’s Fudge timeless.
Whether you’re making it for the holidays, gifting it to friends, or enjoying a quiet piece with a cup of coffee, this fudge carries love in every bite. From our family kitchen to yours, may it bring sweetness, joy, and a little bit of magic to your day.