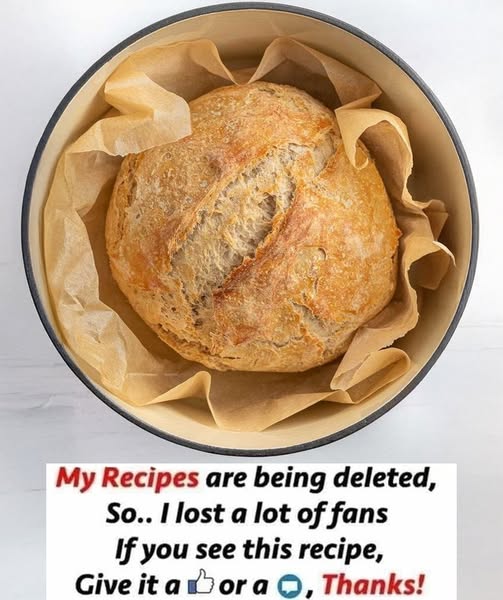
Easiest Sourdough Bread – A Beginner‑Friendly Guide to Homemade Loaves
If you’ve been wanting to bake homemade bread but felt intimidated by elaborate recipes, then this Easiest Sourdough Bread guide is your gateway to real artisan bread at home. With just a few ingredients—your established starter, flour, water, and salt—you’ll be enjoying rustic loaves with crusty exteriors and tender, tangy interiors. Let’s break it all down step by step so you can bake with confidence.
🧾 Ingredients
For the Starter (if you don’t already have one)
- ½ cup (60 g) whole wheat flour
- ¼ cup (60 g) warm water (~85 °F)
(Once your starter is bubbling and active, you can use it to bake the bread.)
For the Bread Dough
- 1 cup active sourdough starter
- 2 cups all‑purpose flour
- 1 teaspoon salt
- 1 cup water
👣 Step‑by‑Step Instructions
1. Building Your Starter
- Day 1: Combine 60 g whole wheat flour and 60 g warm water in a clean ¾ L jar. Stir until smooth, cover loosely, and let sit in a warm spot (75‑80 °F) for 24 hours.
Tip: A warm oven with the light turned on is a handy micro‑proofing spot. - Day 2: Check for bubbles. If none visible, that’s okay—leave it for another 24 hours.
- Day 3: Discard about half of the mixture (leaving ~60 g). Then feed with 60 g all‑purpose flour + 60 g warm water. Stir until smooth.
- Days 4–6: Each day, discard about half, then feed with 60 g flour + 60 g water. You’ll begin to see rising, falling, bubbles, and a stretchier texture.
- Day 7 (or later): When the starter doubles in size reliably, is bubbly throughout, and smells pleasantly tangy (not sour socks), you’re ready to bake.
2. Making the Bread Dough
- In a large bowl, mix together 1 cup starter, 2 cups all‑purpose flour, 1 teaspoon salt, and 1 cup water. Stir until a dough forms.
- Knead the dough on a lightly floured surface for 5‑10 minutes until smooth and elastic.
- Place the dough in a greased bowl, cover it, and allow it to rise for 8‑12 hours (overnight works great) until it has visibly expanded.
- Preheat your oven to 450 °F (230 °C). Place a Dutch oven or lidded casserole dish inside to preheat as well.
- Once hot, carefully remove the dish, place the dough inside (you can slash the top for a decorative crust), replace the lid, and bake for 30 minutes.
- After 30 minutes, remove the lid and bake an additional 15‑20 minutes, or until the crust is deeply golden brown and crisp.
- Let the bread cool on a wire rack before slicing—resist the urge to cut into it too soon.
🍞 Why This Recipe Works
- Uses just four ingredients—simple and accessible.
- Active sourdough starter provides both leavening and flavor.
- Long rise time develops structure and depth of taste.
- Baking in a pre‑heated lidded pot traps steam for that artisan crust.
- Cooling before slicing helps finish the baking process internally.
🧠 Tips for Success
- Use filtered or dechlorinated water for your starter and dough—chlorine can inhibit fermentation.
- Keep your starter and dough in a warm, stable environment—cool kitchens slow down activity.
- Use a rubber band or tape on the starter jar to track how much it rises each feeding
- For best crust and texture, use a pre‑heated Dutch oven and allow the loaf to cool completely before slicing.
🔄 Variations & Custom Options
- Use whole wheat flour or bread flour in place of all‑purpose for more depth.
- Add seeds or oats on top before baking for extra crunch.
- Incorporate herbs or garlic powder into the dough for a flavored loaf.
- Shape into loaves, baguettes or rolls depending on preference.
🗓️ Storage & Reheating
- Store leftover bread in a paper bag or bread box for 2‑3 days.
- To refresh the crust, pop it in a 350 °F oven for 5‑7 minutes.
- Freeze portions if you want them later—slice, wrap and freeze; thaw at room temp and crisp in the
- oven.
❤️ Final Thoughts: Homemade Bread Made Simple
There’s something genuinely satisfying about pulling a warm loaf of homemade sourdough bread out of the oven—crust crackling, aroma filling your kitchen, slices freshly toasted or slathered in butter. With this easiest sourdough bread approach, you’re getting all that home‑baked goodness without overwhelming technique or endless fuss.
Start your starter, commit to the feedings, and soon you’ll be baking loaves you’re proud of. You might surprise yourself with how much flavor and texture you can achieve with such a simple recipe. Happy baking!
