How to Thoroughly Clean Dull and Grimy Kitchen Cabinets
Kitchen cabinets often bear the brunt of daily cooking, trapping grease, food splatters, dust, and fingerprints. Over time, they lose their shine and become sticky or discolored. Fortunately, you don’t need expensive cleaners or harsh chemicals to restore their beauty. With a few simple household ingredients and the right method, you can thoroughly clean dull and grimy kitchen cabinets and bring back their original luster.
Why Kitchen Cabinet Cleaning Matters
Kitchen cabinets aren’t just storage—they are central to your kitchen’s aesthetic and hygiene. Regular cleaning:
- Prevents buildup of grease and bacteria
- Extends the life of wood and finish
- Improves air quality by reducing allergens and grime
- Keeps your kitchen looking fresh and inviting
In many cultures, especially across Europe and Asia, the cleanliness of a kitchen is viewed as a direct reflection of household pride and hospitality. Clean cabinets represent care, order, and respect for the heart of the home.
What You’ll Need (Ingredients & Tools)
To clean effectively without damaging surfaces, prepare the following:
- 2 cups warm water
- 2 tablespoons grease-cutting dish soap (or castile soap for a natural option)
- 1 cup white vinegar
- 2 tablespoons baking soda
- 2 tablespoons olive oil or mineral oil (for polishing)
- 2 microfiber cloths (one for cleaning, one for drying)
- 1 soft-bristle brush or old toothbrush
- Spray bottle (for easy application)
Optional Additions:
- A few drops of lemon essential oil for a fresh, clean scent
- Magic eraser for stubborn scuff marks
- Rubber gloves to protect sensitive skin
- Store-bought wood polish for added shine on older cabinets
Step-by-Step Instructions to Clean Grimy Kitchen Cabinets
1. Prepare Your Cleaning Solution
Mix together:
- 2 cups warm water
- 2 tablespoons dish soap
- 1 cup white vinegar
Pour into a spray bottle or a bowl. This all-purpose solution is gentle on wood but tough on grease and grime. For extra buildup, make a baking soda paste by mixing baking soda with a little water.
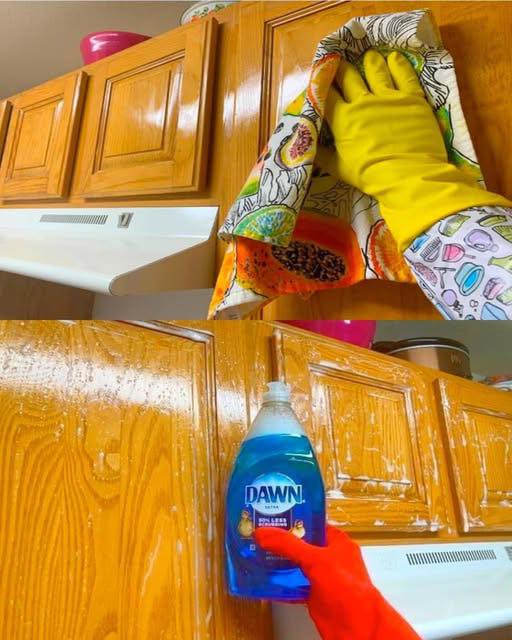
2. Wipe Down Surfaces
- Dip a microfiber cloth into the cleaning solution.
- Wring it out well—avoid excess moisture, especially on wooden cabinets.
- Wipe all surfaces: doors, edges, handles, and trim.
- Spray directly on greasy spots if needed and let it sit for 2–3 minutes before wiping.
3. Scrub Problem Areas
Use the baking soda paste and a soft-bristle toothbrush to scrub:
- Grease-stained corners
- Sticky handles
- Edges around knobs and pulls
- Bottom cabinet lips, where grime often collects
Use circular motions and moderate pressure. Avoid using anything too abrasive that could scratch the finish.
4. Rinse and Remove Residue
- Dampen a clean cloth with plain water.
- Wipe down all cabinet surfaces again to remove soap, grease, and baking soda residue.
- This step is critical for a clean finish and to prevent streaks.
5. Dry Thoroughly
- Use a separate dry microfiber cloth to buff all surfaces.
- Drying not only prevents water spots but also protects wood from moisture damage.
6. Polish for Shine (Optional)
- Apply a small amount of olive oil or mineral oil to a soft cloth.
- Gently buff cabinet surfaces in a circular motion.
- This restores the wood’s natural glow, hides minor scratches, and protects the surface.
Want more shine? Use a commercial wood polish if your cabinets are particularly worn.
Tips for Best Results
- Start at the top of your cabinets and work your way down to prevent drip marks.
- Always test your solution on an inconspicuous area before cleaning the whole surface.
- Don’t use too much water—over-saturation can warp wood.
- Repeat the baking soda scrub every few months for high-traffic kitchens.
- Don’t forget the cabinet interiors and tops (especially on open-top models).
Alternative Cleaners and Natural Substitutes
Looking for green cleaning solutions?
- Castile soap + warm water = eco-friendly dish soap alternative
- Lemon juice + vinegar = natural degreaser with a refreshing scent
- Essential oils like tea tree, eucalyptus, or lavender can be added for natural antibacterial properties
Avoid using ammonia, bleach, or abrasive powders, which can strip cabinet finishes and cause long-term damage.
How Often Should You Clean Your Kitchen Cabinets?
- Light cleaning: Every 2–3 weeks, especially near stovetops and prep areas
- Deep cleaning: Every 2–3 months
- Full polish treatment: Twice a year
Pair with seasonal cleaning routines or holiday prep for a kitchen that always feels fresh.
Common Mistakes to Avoid
- Skipping the rinse step – Leftover soap can leave a filmy residue
- Using too much liquid – Causes swelling or peeling on wooden cabinets
- Neglecting hardware – Clean handles and knobs separately with vinegar or soapy water
- Over-polishing – Too much oil can make cabinets sticky and attract more dust
Benefits Beyond Clean Surfaces
✅ Health Benefit
Reduced allergens, dust, mold, and bacteria build-up from neglected grease and grime.
✅ Aesthetic Benefit
Instantly makes your kitchen look newer, brighter, and more cared for.
✅ Longevity Benefit
Proper care extends the life of your cabinetry, especially wood or veneer finishes.
✅ Environmental Benefit
Using natural, homemade cleaners reduces chemical use and supports a more eco-friendly home.
Final Thoughts
A sparkling kitchen starts with clean cabinets. Whether you’re prepping for guests, organizing your kitchen, or simply doing routine maintenance, learning how to thoroughly clean dull and grimy kitchen cabinets is one of the simplest yet most impactful things you can do for your home.
This process requires no fancy equipment and very little cost—but the results speak for themselves. Your cabinets will look and feel refreshed, your kitchen will smell clean, and you’ll enjoy cooking in a space that reflects care and cleanliness.