Homemade Cheese Recipe: How to Make Fresh Cheese from Scratch
Date: July 18, 2025 | By: Admin
There’s something deeply satisfying about crafting food with your own hands—and few things compare to making homemade cheese in your own kitchen. Whether you’re an aspiring homesteader, a curious cook, or just someone who loves wholesome, preservative-free food, this simple homemade cheese recipe will guide you step by step through the process of turning fresh milk into delicious, soft cheese.
This beginner-friendly method requires just three ingredients and basic kitchen tools, making it the perfect starting point for anyone curious about cheesemaking.
Why Make Cheese at Home?
The benefits of making cheese at home go far beyond the joy of DIY:
- ✅ No preservatives or artificial additives
- ✅ Customizable flavor and texture
- ✅ Saves money over time
- ✅ Fun and educational kitchen activity
- ✅ Impress guests with your homemade creation
When you make cheese from scratch, you gain full control over what goes into it—and how it turns out. You can make it creamier, saltier, firmer, or more tangy depending on your preferences.
Ingredients for Homemade Cheese
To make fresh, soft cheese, you only need three simple ingredients:
- 1 gallon (3.8 liters) whole milk – preferably non-ultra-pasteurized for best results
- 1/4 cup lemon juice or white vinegar – your natural acid to separate curds and whey
- 1 teaspoon salt – adjust to taste
Pro Tip: The fresher the milk, the better the cheese. Raw or low-heat pasteurized milk works best if available in your area.
Basic Equipment You’ll Need
You don’t need any fancy cheesemaking gear—just a few tools you likely already have:
- Large heavy-bottomed pot
- Thermometer (optional, but helps with accuracy)
- Colander
- Cheesecloth or clean, thin kitchen towel
- Large mixing bowl
- Slotted spoon or ladle
Step-by-Step Instructions for Making Homemade Cheese
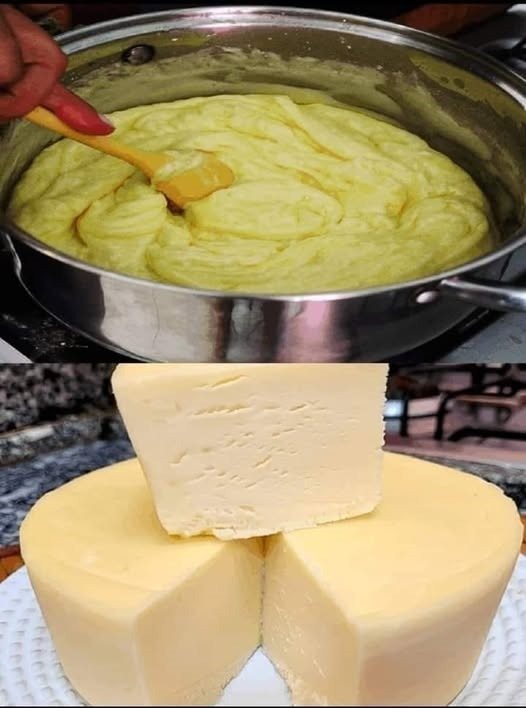
Step 1: Heat the Milk
Pour the milk into your pot and slowly heat it over medium heat until it reaches 180–190°F (82–88°C). Stir occasionally to prevent scorching. A thermometer is helpful but not mandatory—just ensure the milk is steaming hot but not boiling.
Step 2: Add the Acid
Turn off the heat and slowly stir in the lemon juice or vinegar. You’ll notice curds begin to form almost instantly. Gently stir for about 1–2 minutes, then let the pot sit undisturbed for 10–15 minutes to allow full curdling.
Note: If curds don’t form well, add a bit more acid (1–2 tablespoons) and give it a gentle stir.
Step 3: Drain the Curds
Line your colander with cheesecloth and place it over a large bowl. Carefully pour the curds and whey into the colander. Allow it to drain for 5–20 minutes, depending on how soft or firm you want your cheese.
- Less draining = creamier, spreadable cheese
- More draining = firmer, crumbly cheese
Step 4: Season the Cheese
Gather the curds in the cloth and gently press out any extra liquid. Transfer to a bowl and mix in salt to taste. You can also add herbs, garlic, chives, or spices at this stage for a flavored cheese.
Step 5: Chill and Store
Shape your cheese into a ball or pack it into a small container. Refrigerate for at least 1 hour before serving—it will firm up as it chills.
- Refrigeration life: Up to 1 week in an airtight container.
Tips for the Best Homemade Cheese
- 🧂 Salt at the end, not during the curdling stage—it allows better control over taste.
- 🌿 Add-ins: Try mixing in herbs, cracked pepper, or even sundried tomatoes for gourmet results.
- ❄️ Use cold milk from the start and heat slowly for smoother curds.
- 🍽️ Use the leftover whey in smoothies, bread dough, or soups—it’s packed with protein and flavor.
Common Questions About Homemade Cheese
What kind of milk is best for homemade cheese?
Whole milk is ideal. Avoid ultra-pasteurized milk as it often doesn’t curdle well. Raw milk gives excellent results but must be used safely and responsibly.
Can I use plant-based milk?
This particular recipe is for dairy milk. Vegan cheese requires a different method and ingredients (like cashews, soy milk, or agar).
Is this the same as paneer or ricotta?
Yes! This basic cheese recipe is similar to paneer (Indian cheese) or ricotta, depending on how long you drain it. Less draining = ricotta texture. Longer draining and pressing = paneer-style firmness.
Can I make this cheese lactose-free?
You can try using lactose-free milk, but results vary depending on the brand and processing. It’s best to test with small batches.
Creative Ways to Use Homemade Cheese
Once you’ve made your cheese, the real fun begins—using it in recipes! Here are some delicious ways to enjoy it:
- 🥪 Spread on toast or crackers with a drizzle of honey or olive oil
- 🍝 Stir into pasta for a creamy texture
- 🥗 Crumble over salads for a fresh, tangy bite
- 🧁 Blend into cheesecakes or savory pastries
- 🥘 Stuff into lasagna, ravioli, or stuffed shells
Homemade cheese also makes a fantastic gift—wrap it up in parchment with a ribbon and a jar of jam for a thoughtful, edible present.
Health Benefits of Homemade Cheese
Unlike commercial cheeses, your homemade version:
- 🧀 Contains no artificial preservatives or colors
- 🧀 Is lower in sodium
- 🧀 Uses fresh, whole ingredients
- 🧀 Is rich in calcium, protein, and healthy fats
Conclusion: Say Cheese to Homemade Goodness
Making cheese at home is easier than you think, and once you’ve tasted fresh, homemade curds, there’s no going back. With just milk, acid, and salt, you can create a soft cheese that’s incredibly versatile, delicious, and satisfying.
Whether you’re eating it plain, spreading it on crackers, or using it in dinner recipes, homemade cheese is a small luxury that turns everyday meals into something extraordinary. So roll up your sleeves, grab your pot, and get ready to impress your tastebuds—and your guests.