Delicious Cherry Pie Bars: A Crowd-Pleasing Birthday Treat
When it comes to showstopping birthday desserts, few treats can match the nostalgic, home-baked charm of cherry pie bars. Their luscious cherry filling, buttery crust, and simple preparation make them an ideal addition to any celebration. Whether you’re hosting a birthday bash, a holiday gathering, or simply looking to indulge in something sweet, these cherry pie bars are your new go-to recipe.
These bars are not only easy to prepare, but also guaranteed to disappear quickly at any party. They strike the perfect balance between comfort food and elegant dessert, which is why they’ve become a beloved crowd-pleaser for all ages.
Why Cherry Pie Bars Are the Ultimate Birthday Dessert
Unlike traditional pies, which require rolling and precise crust work, cherry pie bars offer all the flavor of cherry pie in a much more convenient, sliceable form. The layered bar format makes them easier to serve at gatherings, and they travel well—ideal for potlucks, picnics, and especially birthdays.
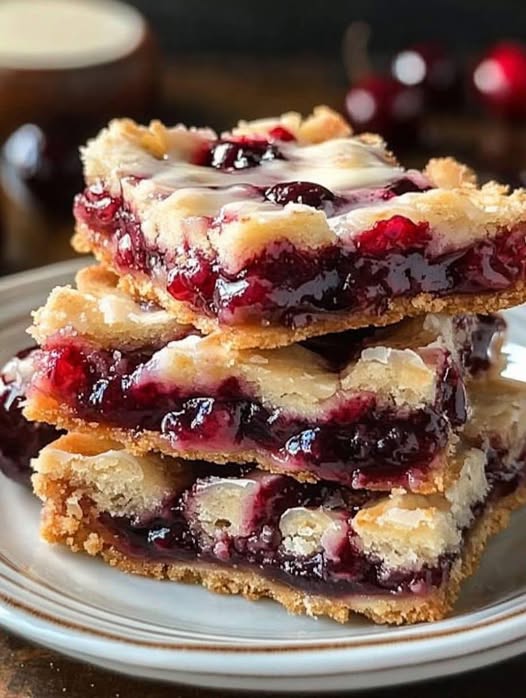
Their sweet-tart cherry filling pairs beautifully with a rich, buttery shortbread crust, creating a layered texture that’s both satisfying and indulgent. And the best part? You don’t have to be a pastry chef to make them. This recipe is approachable for beginners and still impressive enough for seasoned bakers.
Ingredients for the Best Cherry Pie Bars
To create a batch of these delectable bars, you’ll need simple pantry staples:
- 1 can (21 ounces) cherry pie filling
- 2 ½ cups all-purpose flour
- 1 ½ cups granulated sugar
- 1 teaspoon baking powder
- ¼ teaspoon salt
- 1 cup unsalted butter, softened
- 1 large egg
- 1 teaspoon vanilla extract
- 1 tablespoon lemon juice (optional, enhances cherry brightness)
- Powdered sugar for dusting (optional, for presentation)
Step-by-Step Method to Make Cherry Pie Bars
1. Preheat and Prep
Begin by preheating your oven to 350°F (175°C). Line a 9×13-inch baking pan with parchment paper or lightly grease it with butter to prevent sticking.
2. Prepare the Crust and Crumble Topping
In a large mixing bowl, combine:
- 2 ½ cups of all-purpose flour
- 1 ½ cups of sugar
- 1 teaspoon of baking powder
- ¼ teaspoon salt
Add the softened butter, egg, and vanilla extract to the dry mixture. Use a pastry cutter or your hands to mix until the dough becomes crumbly. You want the texture to resemble coarse crumbs, with the butter fully incorporated.
Reserve 1 cup of this mixture for the topping.
3. Assemble the Base
Press the remaining dough mixture evenly into the prepared baking pan to form the crust. Use your fingers or the bottom of a measuring cup to press it firmly and evenly.
4. Add the Cherry Layer
Spread the cherry pie filling evenly over the crust. If you’re using the optional lemon juice, mix it into the cherry pie filling before spreading to enhance the fruity flavor with a subtle tartness.
5. Crumble and Bake
Sprinkle the reserved cup of crumb mixture over the cherry layer, distributing it evenly for a rustic, golden topping.
Place the pan in the preheated oven and bake for 35 to 40 minutes, or until the top is lightly golden and the cherry filling is bubbly.
6. Cool and Serve
Allow the bars to cool in the pan for at least 30 minutes before slicing. For cleaner cuts, cool completely and refrigerate for an hour. Dust with powdered sugar just before serving for a bakery-style finish.
Tips to Elevate Your Cherry Pie Bars
Use Homemade Cherry Filling
While canned cherry pie filling works perfectly, making your own adds a personal touch. Simmer pitted cherries, sugar, and cornstarch over medium heat until thickened. A splash of almond extract enhances the cherry flavor beautifully.
Make It Festive for Birthdays
Add birthday flair by topping the bars with a vanilla glaze or colorful sprinkles before serving. To make a quick glaze, mix 1 cup powdered sugar with 2 tablespoons milk and a drop of vanilla extract.
Serve with Ice Cream or Whipped Cream
Serve warm cherry pie bars with a scoop of vanilla ice cream or a dollop of whipped cream for an extra-luxurious birthday treat.
Storage and Make-Ahead Tips
Cherry pie bars store well, making them ideal for planning ahead. Here’s how:
- Room Temperature: Store in an airtight container for up to 2 days.
- Refrigerator: Keep for up to 5 days—just bring to room temperature before serving.
- Freezer: Wrap individual bars in plastic wrap, place in a freezer-safe bag, and freeze for up to 3 months.
When ready to serve, thaw overnight in the fridge and warm slightly for that fresh-baked feel.
Why These Bars Are a Birthday Must-Have
When planning a birthday celebration, especially for large groups, cherry pie bars offer the perfect solution: easy to transport, quick to cut and serve, and universally adored. Unlike frosted cakes that require refrigeration or delicate pies that demand careful slicing, these bars are low-maintenance and high-impact.
Their vibrant cherry color also adds a beautiful pop to the dessert table—no decorating needed. And because they’re served in bar form, there’s no pressure to get the perfect slice—each square is already portioned and ready to enjoy.
Cherry Pie Bar Variations for Every Palate
- Almond Cherry Bars: Add ½ teaspoon of almond extract to the filling or crumble for a nutty twist.
- Chocolate Cherry Bars: Mix in mini chocolate chips with the crumble topping for extra richness.
- Cherry Cream Cheese Bars: Layer sweetened cream cheese beneath the cherry filling for a cheesecake-inspired variation.
- Mixed Berry Bars: Replace cherry filling with raspberry, blueberry, or a triple-berry blend for a seasonal update.
These variations ensure you can keep this recipe fresh and exciting, no matter how many birthdays you bake them for.
Final Thoughts: A Timeless Treat Worth Celebrating
Cherry pie bars combine the comfort of a classic dessert with the convenience modern bakers crave. Whether you’re baking for a child’s birthday party, a milestone celebration, or just craving something sweet, these bars deliver flavor, simplicity, and nostalgic joy in every bite.
They’re not only perfect for birthdays but also ideal for holidays, potlucks, or a midweek treat. Once you make them, you’ll understand why they’ve become a beloved family tradition for so many.