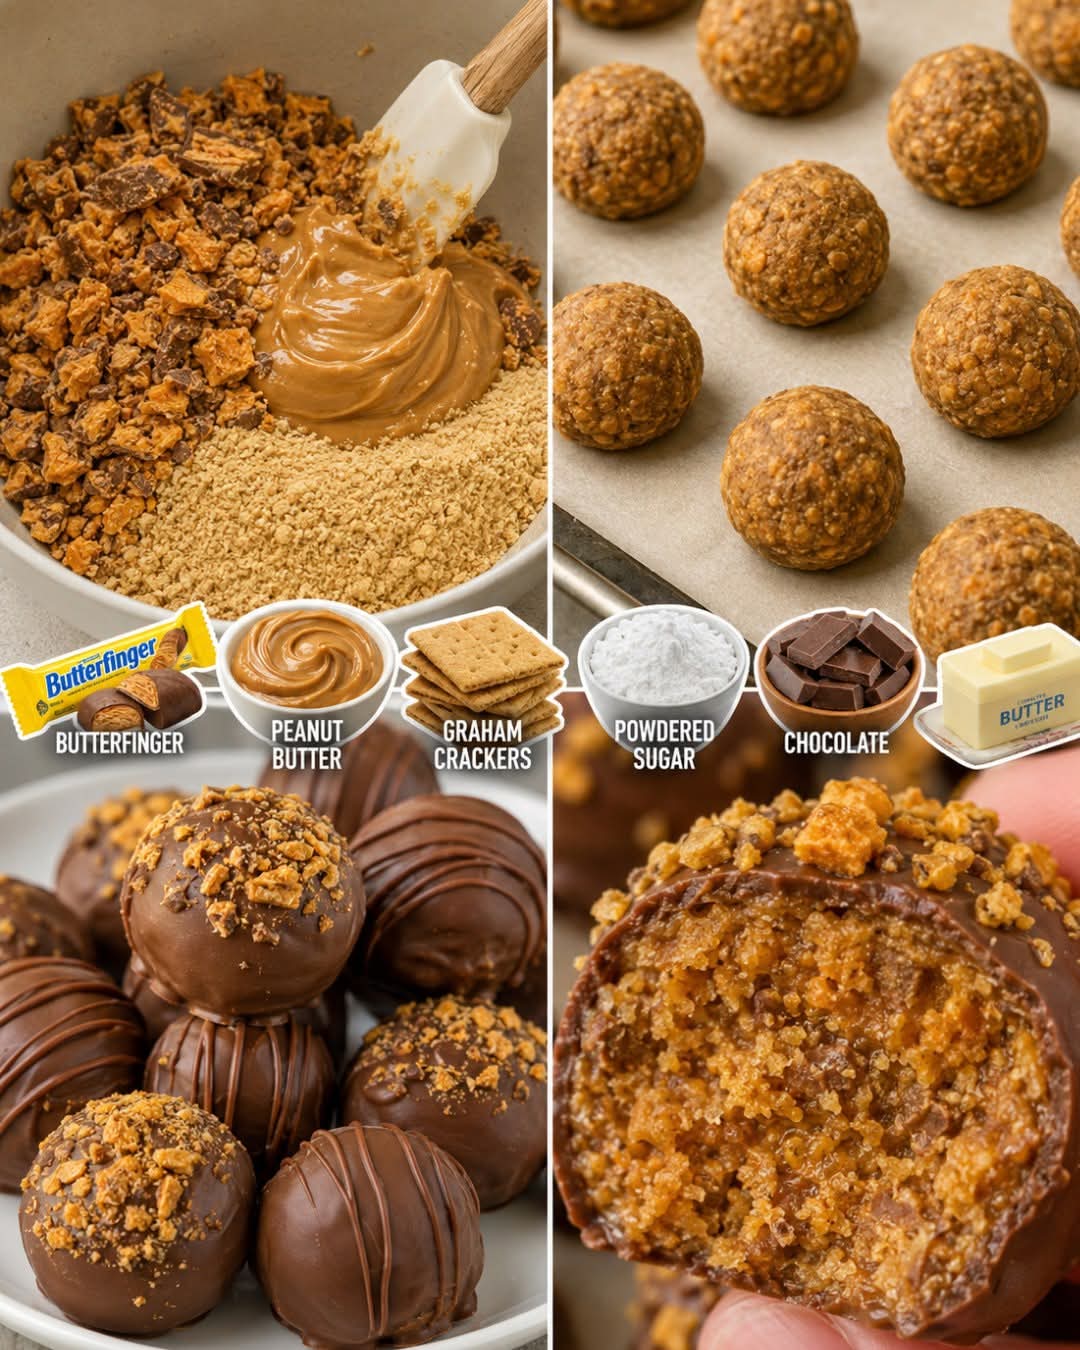
🍫 Butterfinger Balls — Easy No-Bake Chocolate Peanut Butter Treats
Introduction
Butterfinger Balls are rich, bite-sized candies made with the irresistible combination of peanut butter, Butterfinger pieces, graham cracker crumbs, powdered sugar, and chocolate. They have a creamy, slightly crunchy center and a smooth chocolate coating—perfect for holidays, parties, cookie trays, gifts, or simply keeping in the refrigerator for a sweet treat.
There are several versions of Butterfinger Balls. Some use crushed Butterfinger bars with graham crackers, while another very simple copycat version uses candy corn and peanut butter to create a Butterfinger-like center.
This recipe uses the crushed-candy-bar version, giving you plenty of real Butterfinger flavor and texture.
🥜 Ingredients
For the Butterfinger filling
- 2 cups graham cracker crumbs
- 1 cup unsalted butter, softened
- 2 cups powdered sugar
- 1½ cups creamy or crunchy peanut butter
- 5 regular-size Butterfinger candy bars, finely crushed
- 1 teaspoon vanilla extract — optional
- ¼ teaspoon salt — optional, especially if using unsalted peanut butter
For the chocolate coating
- 12–16 ounces semi-sweet or milk chocolate chips
- 1 teaspoon vegetable shortening or coconut oil, optional, for a smoother coating
- ¼ cup finely crushed Butterfinger pieces, for decoration
- Sprinkles, optional
The combination of graham crumbs, butter, powdered sugar, peanut butter and crushed Butterfinger is a traditional style of Butterfinger Ball preparation; published versions commonly make roughly 30–40 pieces depending on size.
🍬 Formation of the Butterfinger Balls
The recipe comes together in four simple layers:
Crush → Mix → Roll → Dip
The graham crackers give the mixture body, the peanut butter creates the creamy center, and the crushed Butterfinger adds the characteristic crunchy candy flavor. Finally, everything is surrounded by a layer of melted chocolate.
👩🍳 Instructions
Step 1 — Prepare the Butterfinger pieces
Unwrap the Butterfinger bars and chop them into small pieces.
For an especially good texture, don’t turn every piece into powder. Keep some pieces slightly larger so that you get little pockets of crunchy Butterfinger throughout the filling.
Set aside about ¼ cup of the crushed pieces for decorating later.
Step 2 — Crush the graham crackers
Place the graham crackers into a food processor and pulse until they become fine crumbs.
Alternatively, place them in a sealed bag and crush them with a rolling pin.
You need approximately 2 cups of crumbs.
Step 3 — Cream the butter and powdered sugar
Place the softened butter into a large mixing bowl.
Add the powdered sugar gradually and beat until the mixture becomes:
- Smooth
- Creamy
- Light
- Easy to spread
This usually takes about 2–3 minutes with an electric mixer.
Step 4 — Add the peanut butter
Add the peanut butter and vanilla extract.
Mix thoroughly until the peanut butter is completely incorporated.
If using crunchy peanut butter, you’ll get an even more textured center.
Step 5 — Add the dry ingredients
Add the graham cracker crumbs and crushed Butterfinger pieces.
Mix everything together until a thick candy dough forms.
The mixture should be soft enough to roll but firm enough to hold its shape.
If the mixture is too soft:
Add a few tablespoons of graham cracker crumbs.
If it is too dry:
Add 1 tablespoon of peanut butter at a time until the desired consistency is reached.
❄️ Step 6 — Chill the mixture
Cover the bowl and refrigerate the mixture for approximately 30 minutes.
This makes the dough much easier to shape and prevents the balls from becoming too soft while you’re working with them. Similar published recipes specifically chill the mixture before rolling.
🍫 Step 7 — Roll into balls
Line a baking sheet with parchment or wax paper.
Use a small cookie scoop or tablespoon to portion the mixture.
Roll each portion between your palms until you have a smooth ball.
Aim for approximately 1-inch balls.
Place each ball onto the prepared baking sheet.
You should get approximately 30–40 Butterfinger Balls, depending on how large you make them.
❄️ Step 8 — Chill again
Place the shaped balls into the refrigerator for another 15–20 minutes.
For an even firmer center, you can place them in the freezer for about 10 minutes.
🍫 Step 9 — Melt the chocolate
Place the chocolate chips into a microwave-safe bowl.
Microwave for 30 seconds, then stir.
Continue heating in 15–30 second intervals, stirring thoroughly after each interval.
Stop as soon as the chocolate becomes smooth.
Important:
Don’t overheat the chocolate. Chocolate can become thick and difficult to work with if overheated.
If desired, stir in 1 teaspoon of vegetable shortening or coconut oil to make the coating smoother.
A double-boiler method also works well for gently melting chocolate.
🥜 Step 10 — Dip the Butterfinger Balls
Take one chilled ball at a time.
Place it into the melted chocolate using a fork or dipping tool.
Roll it around until completely coated.
Lift it out and gently tap the fork against the side of the bowl to allow excess chocolate to drip away.
Place the chocolate-covered ball onto the parchment paper.
Repeat with all the remaining balls.
✨ Step 11 — Decorate
While the chocolate is still wet, sprinkle the tops with:
- Crushed Butterfinger
- Chocolate sprinkles
- Holiday sprinkles
- Chopped peanuts
- Mini chocolate chips
Or simply leave them plain for an elegant chocolate finish.
❄️ Step 12 — Let the chocolate set
Allow the chocolate coating to harden at room temperature for approximately 10–20 minutes.
For faster setting, refrigerate the balls for about 15 minutes.
Once completely firm, they’re ready to serve.
⭐ Best Method for Perfect Butterfinger Balls
Method 1 — Creamy Center
Use creamy peanut butter and finely crushed Butterfinger.
This gives you a smooth, rich filling with small crunchy candy pieces.
Method 2 — Extra Crunchy
Use crunchy peanut butter and leave some Butterfinger pieces larger.
This is my favorite method if you love texture.
Method 3 — Extra Chocolatey
Dip each ball twice.
First coat it lightly, let that layer set, then dip again.
You’ll get a thicker chocolate shell.
Method 4 — Holiday Style
Add colorful sprinkles immediately after dipping.
Red and green work beautifully for Christmas, while pastel sprinkles are perfect for Easter.
💡 Helpful Tips & Tricks
Don’t skip the chilling
Cold filling is much easier to roll and dip.
Use softened—not melted—butter
Melted butter can make the mixture too loose.
Crush the Butterfinger properly
A mixture of fine crumbs and small pieces gives the best texture.
Keep the chocolate warm
If your chocolate begins becoming thick while you’re dipping, warm it gently for a few seconds and stir.
Make them ahead
These are excellent make-ahead treats. Published versions recommend storing finished balls in an airtight container in the refrigerator for up to about a week.
🕰️ A Little History
Butterfinger Balls belong to the long tradition of American homemade chocolate-covered peanut-butter candies. Peanut butter balls and chocolate-covered confectionery have been popular in American home baking for decades, with recipes often combining peanut butter, confectioners’ sugar, butter and chocolate.
The Butterfinger-inspired variation takes that familiar peanut-butter-ball idea and adds crushed Butterfinger candy, creating an especially rich combination of peanut butter, chocolate and crunchy candy.
Another popular homemade Butterfinger technique uses melted candy corn mixed with peanut butter and then coated in chocolate. This shortcut has become a widely circulated copycat method.
So there are really two delicious directions: Butterfinger Balls made with crushed candy bars, like this recipe, or the three-ingredient candy-corn version.
❤️ Why Lovers of This Recipe Enjoy It
These little treats have almost everything a dessert lover wants:
🥜 Peanut butter: creamy and rich
🍫 Chocolate: smooth and indulgent
🍬 Butterfinger: crunchy and caramel-like
🍪 Graham crackers: provide structure and a pleasant crumb
✨ No oven: completely no-bake
🎉 Party-friendly: easy to make in large batches
🎁 Giftable: perfect for holiday boxes and dessert trays
They’re especially good when served cold, because the center becomes firmer and the chocolate coating develops a satisfying snap.
🍽️ Serving Ideas
Serve Butterfinger Balls alongside:
- Chocolate chip cookies
- Brownies
- Peanut butter cookies
- Cheesecake bites
- Chocolate-covered pretzels
- Fudge
- Hot chocolate
- Coffee
- Ice cream
For a dessert platter, arrange them in small paper candy cups. They look beautiful and are easy for guests to pick up.
📦 Storage
Place the finished Butterfinger Balls in an airtight container.
Refrigerator:
Store for approximately up to 1 week.
Freezer:
For longer storage, freeze them in a sealed freezer-safe container, separating layers with parchment paper. Thaw them in the refrigerator before serving.
🍫 Easy 3-Ingredient Alternative
If you want an even simpler Butterfinger-style ball, you can make a version with:
- 1 cup candy corn
- ⅔ cup peanut butter
- 2 cups semi-sweet chocolate chips
- 1 teaspoon shortening, optional
Melt the candy corn gently, stir in peanut butter, portion into balls, chill until firm, then dip in melted chocolate. This style is documented in several homemade Butterfinger recipes.
The texture is different from the crushed-Butterfinger recipe—it is more like a soft, chewy candy center rather than a crumbly peanut-butter ball.
🎄 Perfect for Holidays
Butterfinger Balls are especially wonderful for:
- Christmas cookie exchanges
- Thanksgiving dessert tables
- Birthday parties
- Baby showers
- Valentine’s Day
- Halloween parties
- Potlucks
- Family gatherings
- Homemade food gifts
Put several into a small decorative box or cellophane bag, tie it with ribbon, and you have a simple homemade gift.
🏆 Final Result
After chilling and coating, you should have beautiful bite-sized chocolate balls with a rich peanut-butter center and plenty of Butterfinger crunch.
The outside is smooth and chocolaty while the inside is creamy, crumbly and packed with candy pieces.
❤️ Conclusion
Butterfinger Balls are one of those wonderfully simple homemade treats that look much more complicated than they really are. With a handful of ingredients, a little mixing, rolling and chocolate dipping, you can create an impressive dessert without turning on the oven.
Make them small for parties, large for an extra-indulgent bite, or decorate them with seasonal sprinkles to match any celebration.
One bite gives you peanut butter, chocolate, graham-cracker richness and that unmistakable Butterfinger crunch—all in one delicious little ball. 🍫🥜✨