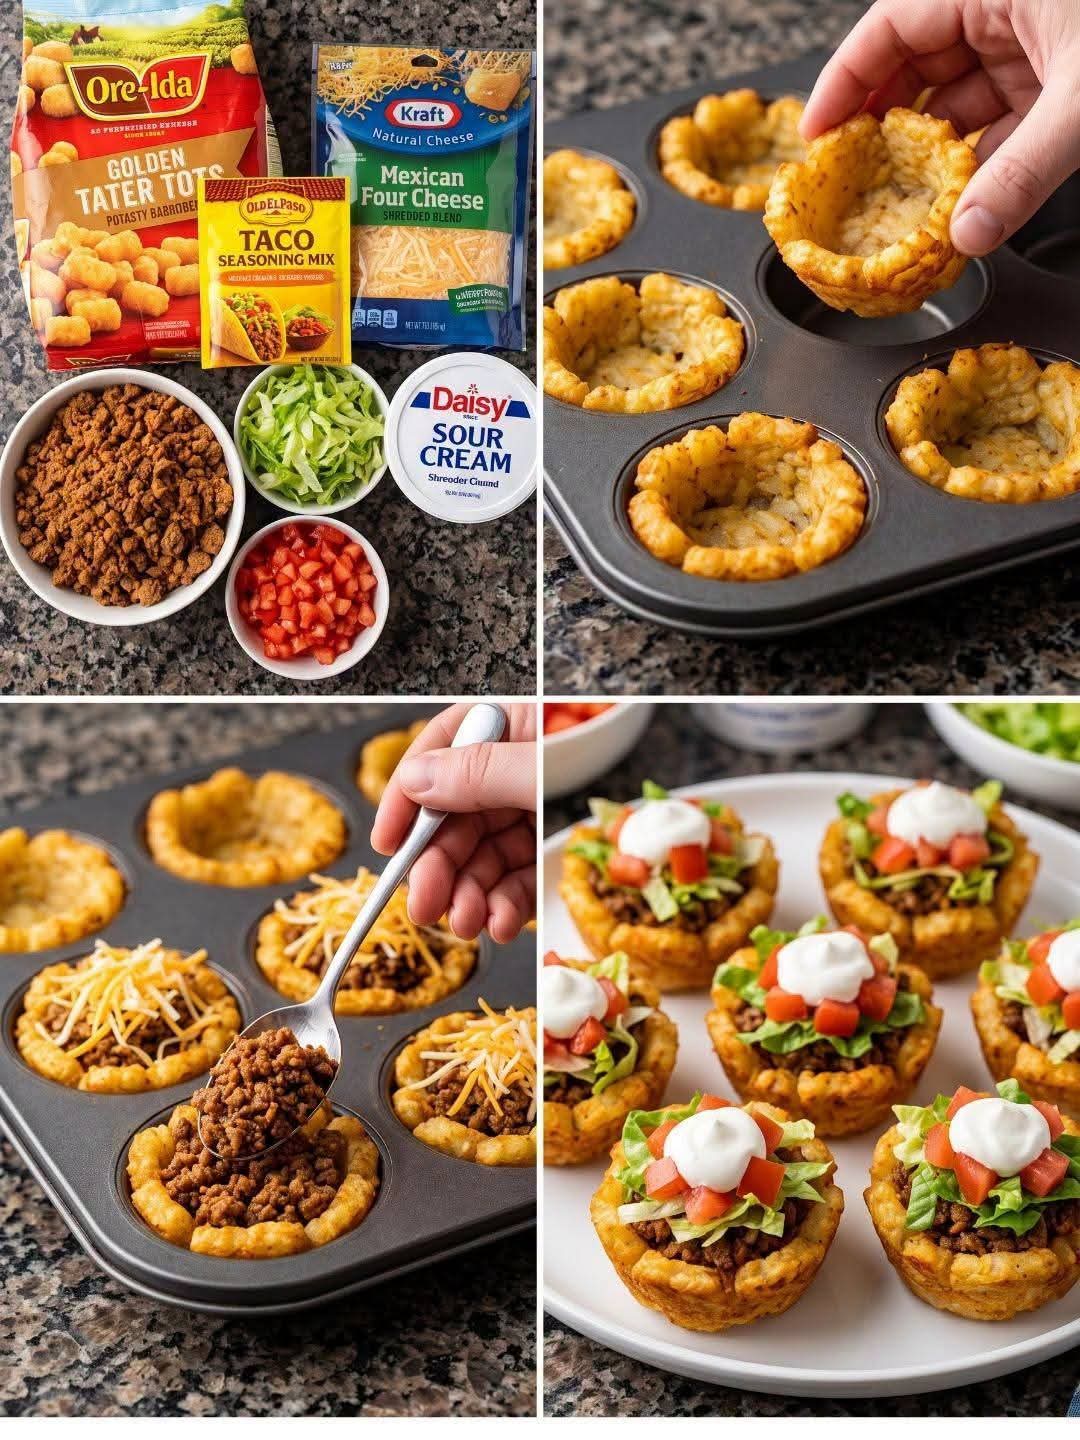
🌮🥔 Baked Taco Tater Tot Cups
Crispy, Cheesy, Taco-Loaded Cups That Make the Perfect Appetizer or Family Dinner
Introduction
If you love tacos, crispy tater tots, and cheesy comfort food, these Baked Taco Tater Tot Cups bring all three together in one irresistible bite! Golden tater tots are baked into little crispy cups, filled with juicy taco-seasoned ground beef, covered with melted cheese, and finished with fresh toppings.
They are easy enough for a weeknight dinner but fun enough for game day, parties, potlucks, birthdays, or family gatherings. Everyone can customize their own cups with salsa, sour cream, tomatoes, jalapeños, lettuce, avocado, or whatever taco toppings they love.
The best part? You don’t need tortillas. The crispy tater tots become the edible taco shell!
Ingredients
For the Tater Tot Cups
- 1 (32-ounce) bag frozen Ore-Ida Golden Tater Tots
- Cooking spray or a little vegetable oil
- 1 cup shredded cheddar cheese
- ½ cup shredded Monterey Jack cheese, optional
For the Taco Beef
- 1 pound ground beef
- 1 (1-ounce) packet Old El Paso Taco Seasoning Mix
- ⅔ cup water
- ½ small onion, finely diced
- 2 cloves garlic, minced
- ½ teaspoon smoked paprika, optional
- ¼ teaspoon black pepper
- ½ cup salsa, optional
For Toppings
- Sour cream
- Salsa
- Diced tomatoes
- Shredded lettuce
- Sliced jalapeños
- Diced avocado or guacamole
- Chopped green onions
- Chopped cilantro
- Extra shredded cheddar cheese
- Sliced black olives
- Lime wedges
Instructions
Step 1: Prepare the Oven
Preheat your oven to 425°F (220°C).
Lightly spray a standard 12-cup muffin tin with cooking spray. Make sure the sides and bottoms are lightly coated so the crispy potato cups release easily after baking.
Step 2: Build the Tater Tot Cups
Place 4–5 frozen tater tots into each muffin cup.
Bake the tots for approximately 10–12 minutes, just until they begin to soften.
Remove the muffin tin from the oven.
Using the back of a small spoon, the bottom of a shot glass, or another small rounded utensil, carefully press the softened tater tots down and up the sides of each muffin cup.
The goal is to create a little potato “basket” with a hollow center.
Important Tip
Press firmly enough to form the cup, but don’t completely crush the potatoes. Keeping some texture helps create a crispier shell.
Return the pan to the oven and bake for another 10–15 minutes, or until the potato cups are golden brown and crisp.
Step 3: Prepare the Taco Beef
While the tater tots are baking, heat a large skillet over medium-high heat.
Add the ground beef and diced onion.
Cook for about 6–8 minutes, breaking the beef apart with a spoon as it cooks.
Continue until the beef is completely browned.
Add the minced garlic and cook for approximately 30 seconds.
Drain excess grease if necessary.
Step 4: Add the Taco Seasoning
Sprinkle the Old El Paso Taco Seasoning Mix over the cooked beef.
Add ⅔ cup water.
Stir everything together until the seasoning is evenly distributed.
Add smoked paprika and black pepper if desired.
Simmer for approximately 3–5 minutes, stirring occasionally, until the sauce thickens.
For extra flavor, stir in ½ cup salsa.
Remove the skillet from the heat.
Step 5: Fill the Tater Tot Cups
Once the potato cups are golden and crisp, carefully remove the muffin tin from the oven.
Spoon approximately 1–2 tablespoons of taco beef into each tater tot cup.
Don’t overfill them because you’ll still need room for cheese.
Sprinkle shredded cheddar cheese over each cup.
Add Monterey Jack as well if you want an extra-creamy cheese topping.
Step 6: Bake Again
Return the muffin tin to the oven.
Bake for approximately 3–5 minutes, or until the cheese is completely melted and bubbly.
Watch carefully during this stage so the potato cups don’t become overly dark.
Step 7: Cool Slightly
Remove the pan from the oven and let the taco cups rest for approximately 3–5 minutes.
This short resting time allows the cheese to set slightly and makes the cups easier to remove.
Run a small butter knife or thin spatula gently around the edges if necessary.
Carefully lift each cup from the muffin tin.
Step 8: Add Your Favorite Taco Toppings
Now comes the fun part!
Top each crispy taco cup with your favorite combination of:
- Sour cream
- Salsa
- Diced tomatoes
- Lettuce
- Jalapeños
- Guacamole
- Green onions
- Cilantro
- Black olives
- Extra cheese
Finish with a small squeeze of fresh lime for a bright, fresh flavor.
Cooking Method
Oven-Baked Method
This is the recommended method because the oven allows the tater tots to become crisp while keeping the inside soft enough to form into cups.
Temperature: 425°F / 220°C
Approximate total cooking time: 30–40 minutes
The exact time can vary depending on your oven, muffin tin, and how crispy you prefer the potato cups.
Formation & Assembly
The secret to these taco cups is the three-layer formation:
Layer 1 — Crispy Potato Shell
The tater tots form the base and walls of the cup. Baking them first gives them enough structure to hold the filling.
Layer 2 — Taco Beef
The seasoned ground beef provides the savory, spicy center.
Layer 3 — Melted Cheese
Cheese goes over the beef and melts into everything, helping bind the filling together.
Then your fresh taco toppings provide the final layer of flavor and texture.
Helpful Tips for Perfect Tater Tot Cups
Don’t thaw the tots first
Frozen tots are easier to handle and maintain their structure as they begin baking.
Use enough tots
If your muffin cups are large, you may need 5 or even 6 tots per cup to create a sturdy shell.
Make the walls thick
Thin potato walls can break when you add the taco filling. Press the potatoes firmly against the sides of the muffin cups.
Make the shells extra crispy
If you like very crispy tater tots, give the empty cups a few extra minutes in the oven before adding the beef.
Don’t overfill
A modest amount of beef makes the cups easier to eat and helps prevent the filling from spilling over.
Let them rest
Allowing them to cool for a few minutes makes them much easier to remove from the muffin tin.
Delicious Variations
🌶️ Spicy Taco Cups
Add diced jalapeños or a pinch of cayenne pepper to the taco beef.
🥓 Bacon Cheeseburger Taco Cups
Mix cooked, crumbled bacon into the ground beef and use cheddar cheese for an extra-rich version.
🫘 Beef & Bean Taco Cups
Add ½ cup refried beans or drained black beans to the taco filling.
🍗 Chicken Taco Cups
Replace the ground beef with shredded cooked chicken and taco seasoning.
🧀 Extra-Cheesy Cups
Use a combination of cheddar, Monterey Jack, and pepper Jack cheese.
🌽 Fiesta Taco Cups
Add drained corn and black beans to the beef mixture for a colorful Southwestern-style filling.
What to Serve With Them
These little cups are fantastic served alongside:
- Mexican rice
- Refried beans
- Corn salad
- Guacamole
- Pico de gallo
- Fresh green salad
- Tortilla chips
- Salsa
- Queso dip
For a party, arrange the taco cups on a large platter and place bowls of toppings around them so everyone can build their own.
Make-Ahead Instructions
You can prepare the taco beef several hours ahead of time.
Cook the beef, allow it to cool, and refrigerate it in an airtight container.
When you’re ready to serve, prepare the tater tot cups fresh, fill them with the reheated taco beef, add cheese, and bake until hot and bubbly.
For the best texture, don’t assemble the finished cups too far in advance because the potato shells can soften.
Storage
Store leftover taco cups in an airtight container in the refrigerator for up to 3–4 days.
For the best texture, reheat them in an oven or air fryer rather than the microwave.
Oven
Reheat at 375°F (190°C) until heated through and crisp.
Air Fryer
Reheat at approximately 350°F (175°C) for a few minutes until hot and crispy.
Add fresh toppings after reheating.
A Little History
Tater tots were developed in the United States in the early 1950s as a creative way to use leftover pieces of cut potatoes. The small cylindrical potato bites quickly became popular because they were inexpensive, convenient, crispy, and comforting.
Tacos, meanwhile, have a much older history rooted in Mexican cuisine. The combination of seasoned meat, vegetables, cheese, and other toppings wrapped in or served with a corn or flour tortilla has become one of the world’s most recognizable foods.
Baked Taco Tater Tot Cups are a modern American comfort-food mash-up, combining the familiar flavors of tacos with the crispy potato goodness of tater tots.
Why Everyone Loves Them ❤️
These taco cups have everything people look for in a party snack:
Crispy: Golden potato edges provide plenty of crunch.
Cheesy: Melted cheese adds richness and helps hold the filling together.
Savory: Taco-seasoned beef brings bold flavor.
Fresh: Tomatoes, lettuce, cilantro, avocado, and lime brighten every bite.
Customizable: Everyone can add exactly the toppings they love.
Easy: A muffin tin turns simple ingredients into something that looks special.
Serving Formation
For a beautiful presentation, arrange the cups on a large serving platter.
Place them close together and sprinkle a little chopped cilantro and green onion over the top.
Serve bowls of:
🌶️ Salsa
🥑 Guacamole
🥛 Sour cream
🧀 Shredded cheese
🍅 Tomatoes
🌶️ Jalapeños
🍋 Lime wedges
right beside the platter.
This creates a fun build-your-own taco cup bar for parties and family dinners.
Final Thoughts
Baked Taco Tater Tot Cups are proof that a few simple ingredients can become something incredibly fun and delicious.
The crispy golden potato shell gives you the crunch of a taco shell, the seasoned beef provides that classic taco flavor, and melted cheese brings everything together. Add fresh toppings and a squeeze of lime, and every bite becomes a combination of crispy, cheesy, savory, creamy, and fresh.
Whether you’re making them for a busy weeknight, a football party, a family gathering, or simply because you have a bag of tater tots waiting in the freezer, these little taco cups are sure to disappear quickly.
❤️ Final Serving Tip
Make a double batch for a crowd—once people taste that crispy tater tot shell + seasoned taco beef + melted cheese combination, one plate may not be enough!
🌮🥔 Crispy. Cheesy. Flavorful. Fun. These Baked Taco Tater Tot Cups are guaranteed to be a family favorite!