Homemade Fresh Apple Snack Packs (No-Brown, Budget-Friendly)
Introduction
Pre-sliced apple packs are convenient, crisp, and ready to grab—but they often come at a premium price. With a simple at-home method, you can prepare the same bright, fresh-tasting apple slices in minutes and keep them from browning naturally. This approach uses a quick soak and a citrusy, carbonated bath to preserve color and crunch, making it ideal for lunchboxes, road trips, and everyday snacking.
Ingredients
- 4–6 fresh apples (firm varieties hold best: Honeycrisp, Fuji, Gala, or Granny Smith)
- 4 cups cold water
- 2 cups lemon-lime soda (such as Sprite or 7-Up)
- Ice (optional, to keep water extra cold)
Equipment
- Sharp knife or apple slicer
- Large bowl
- Colander
- Paper towels
- Zip-top snack bags or airtight containers
Method Overview
This method works by slowing oxidation—the natural browning that happens when apples are exposed to air. A cold-water rinse removes excess surface starch, and the citrusy soda bath adds a light acidic shield that helps maintain the apples’ color and crispness.
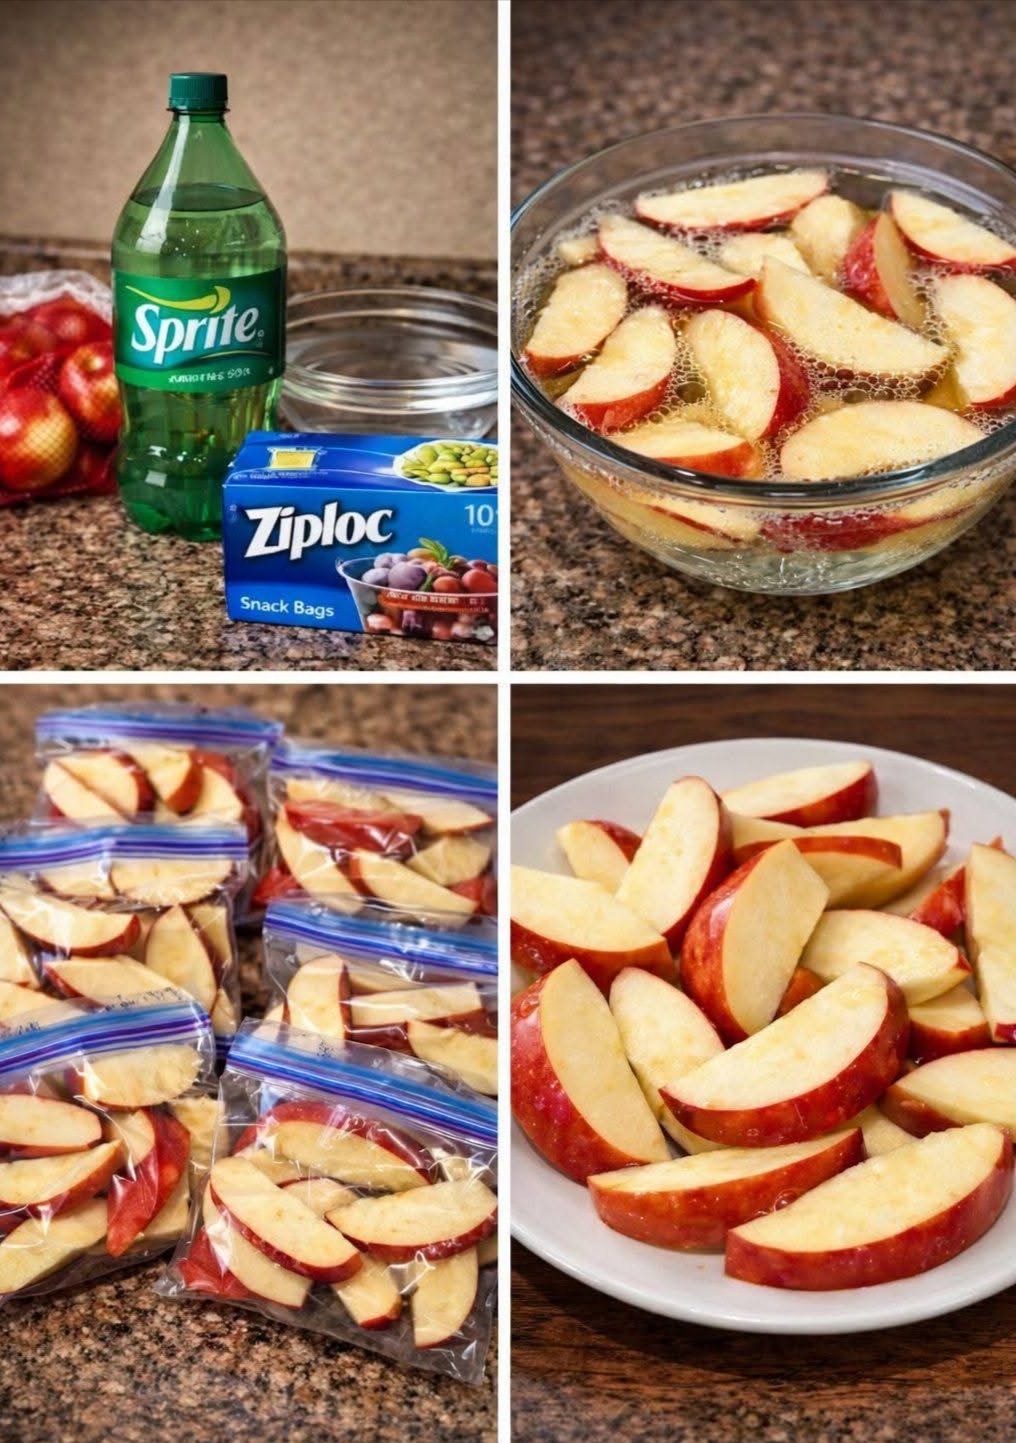
Step-by-Step Instructions
- Prepare the Apples
Wash and dry the apples thoroughly. Slice into even wedges or thin slices, removing the core and seeds. - Cold Water Soak (3–5 minutes)
Place slices into a bowl of very cold water (add ice if desired). This step refreshes the cut surface and slows early oxidation. - Lemon-Lime Soda Soak (3–5 minutes)
Transfer the slices from the water into a bowl filled with lemon-lime soda. Ensure all slices are submerged. - Drain and Dry
Pour the apples into a colander. Pat gently with paper towels to remove excess moisture. The slices should be slightly damp, not wet. - Portion and Store
Divide into snack-size portions and seal in zip-top bags or airtight containers. Store in the refrigerator.
Formation & Storage
- Keep refrigerated at all times.
- Best enjoyed within 3–4 days for peak freshness.
- If packing for lunch, include a small ice pack to maintain crispness.
- For extra freshness, press out as much air as possible from the bags before sealing.
Why This Works (The Science)
Apples brown due to an enzyme called polyphenol oxidase reacting with oxygen. The mild acids in lemon-lime soda (citric and ascorbic acids) slow this reaction, while carbonation helps the liquid contact all surfaces quickly. The result: bright slices that look freshly cut for days.
A Brief History of Apple Preservation
Before refrigeration, people used acidic solutions like lemon water, salt water, or honey water to prevent fruits from browning. This modern soda method is a convenient adaptation using readily available ingredients that achieve the same effect with a subtle, pleasant flavor.
Helpful Variations
- No-soda option: Soak in 1 tablespoon lemon juice per 2 cups water.
- Saltwater method: ½ teaspoon salt per 4 cups water (rinse after soaking).
- Honey water: 1 tablespoon honey per 2 cups water for a gentle sweetness.
- Flavor twist: Add a pinch of cinnamon before packing.
Why Snack Lovers Appreciate This Method
- Saves money compared to store packs
- Keeps apples crisp and visually fresh
- Quick to prepare in batches for the week
- Kid-friendly and lunchbox-ready
- Naturally flavored without artificial preservatives
Conclusion
With a simple soak-and-store technique, you can enjoy ready-to-eat apple slices that stay fresh, appetizing, and budget-friendly. This practical kitchen trick turns a humble fruit into a convenient snack you’ll always have on hand—crisp, bright, and ready whenever hunger strikes.