I Don’t Buy Bread Anymore! The Easiest No-Knead Bread Recipe (No Eggs, No Butter!)
In a world where store-bought bread is often filled with preservatives, additives, and extra costs, homemade bread has become the hero of the kitchen. This no-knead bread recipe is a game-changer for anyone who wants fresh, soft, crusty, bakery-style bread without the hassle of kneading, eggs, or butter. Once you experience how incredibly easy and satisfying it is to bake your own loaf, you might just say the same thing:
“I don’t buy bread anymore!”
🥖 Why This No-Knead Bread Recipe Is So Popular
✅ No kneading required
Forget sore arms and flour-covered counters. This dough practically makes itself—just mix, rest, and bake.
✅ Only 5 ingredients
Made from pantry staples—flour, yeast, salt, sugar, and water. You likely have everything on hand already.
✅ Completely dairy-free & egg-free
No milk, no butter, no eggs. This recipe is vegan-friendly and allergy-conscious.
✅ Beginner-friendly
Even if you’ve never baked bread before, this recipe is fail-proof.
✅ Tastes better than store-bought
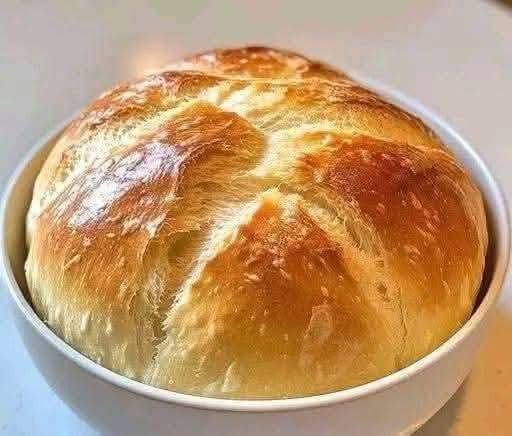
You get a soft interior with a golden crust, and the flavor is rich, hearty, and wholesome.
🍞 Ingredients – Simple, Clean, and Budget-Friendly
You don’t need fancy equipment or a trip to a gourmet store. Just grab these 5 ingredients:
- 3 cups all-purpose flour
(You can substitute bread flour for a chewier texture.) - 1 packet (2 ¼ teaspoons) instant yeast
- 1½ cups warm water
(About 105°F or 40°C – warm to the touch, not hot!) - 1 teaspoon sugar
(Helps feed and activate the yeast.) - 1 teaspoon salt
💡 Optional Add-Ins: Rosemary, garlic powder, chia seeds, sunflower seeds, or dried herbs for added flavor and nutrition.
👨🍳 Step-by-Step Instructions
Step 1: Activate the Yeast
In a large mixing bowl, combine:
- Warm water
- Sugar
- Yeast
Let sit for 5 to 10 minutes until the surface looks foamy and bubbly. This tells you the yeast is active.
Step 2: Mix the Dough
Add the flour and salt to the yeast mixture. Stir with a wooden spoon or silicone spatula until everything comes together into a sticky, shaggy dough.
No kneading needed. Just cover and let it rest.
Step 3: Let It Rise
Cover the bowl with a clean towel or plastic wrap. Place it in a warm, draft-free spot (like your oven with the light on or inside a turned-off microwave). Let it rise for:
- 1 to 2 hours
- Until doubled in size
⏱️ The longer it rises, the better the flavor.
Step 4: Shape the Dough
Sprinkle a little flour on your hands and on your surface. Turn the dough out, gently shape it into a round or oval loaf, or place it in a lightly greased loaf pan or Dutch oven.
No need for perfection—the bread will form beautifully on its own.
Step 5: Bake
Preheat oven to 425°F (220°C). Bake for:
- 25–30 minutes, or until the top is golden brown and sounds hollow when tapped.
🌡️ For extra crispiness, place an oven-safe dish with water on the bottom rack to create steam.
Step 6: Cool Before Slicing
Let your bread cool completely on a wire rack for the best texture. Cutting it too soon can make it gummy.
Now slice, serve, and savor!
🍯 How to Use Your No-Knead Bread
This versatile bread works for nearly anything:
- Toast with jam, honey, or nut butter
- Grilled sandwiches or paninis
- Served with soups or stews
- Homemade garlic bread
- Used as pizza crust base
- French toast or croutons
💡 Expert Tips for Success
- Use warm water—not hot to avoid killing the yeast.
- Add-ins? Sprinkle seeds, garlic, or herbs into the dough before rising.
- For a rustic look, dust the top with flour before baking.
- Want even more crust? Bake on a pizza stone or in a preheated Dutch oven with the lid on for the first 20 minutes.
- Double batch tip: This recipe is easily doubled—just increase rise and bake times slightly.
🥡 Storage & Freezing Tips
Room Temp:
- Store in a bread bag or airtight container for up to 3 days.
Fridge:
- Not recommended—it dries out the bread.
Freezer:
- Wrap tightly in plastic wrap and freeze for up to 2 months.
Slice before freezing for easy thawing.
🌿 Health & Budget Benefits
Not only is this no-knead bread easy and delicious, it’s also:
- Much cheaper than artisan or bakery bread
- Free of additives and preservatives
- Lower in sodium than most store-bought loaves
- Vegan and allergy-friendly
- Customizable to fit dietary needs (whole wheat, gluten-free flour blends, etc.)
🧑🍳 Why I Stopped Buying Bread at the Store
Once you realize how quick, cheap, and satisfying this no-knead bread is, it’s hard to go back to store-bought. No kneading. No complicated steps. No fancy mixers. Just real, simple ingredients and a perfect loaf every time.
No eggs. No butter. No excuses. Just delicious bread.
You won’t just save money—you’ll also know exactly what’s in your food, and nothing beats the smell of freshly baked bread filling your kitchen.
📌 Final Thoughts
This no-knead bread recipe is more than just easy—it’s empowering. With just 5 ingredients and 5 minutes of effort, you can enjoy a fresh, golden loaf that rivals any bakery. Once you bake it, you’ll understand why this is the bread you’ll make again and again.
Ditch the preservatives. Skip the high prices. Say hello to homemade simplicity.
Bake it once, and you’ll never go back to store-bought again. 🥖✨