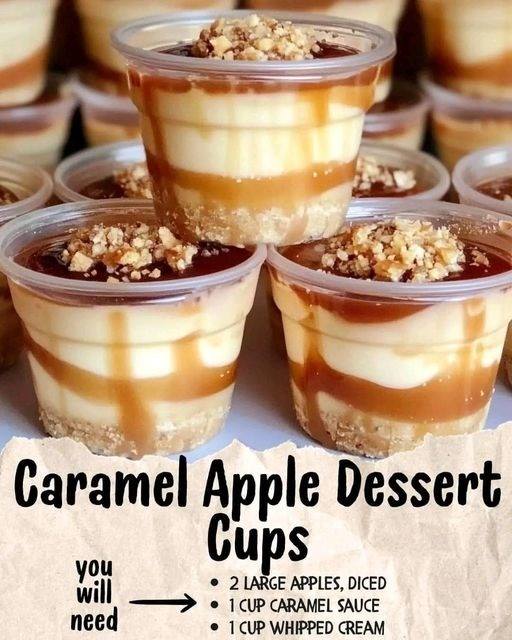
Caramel Apple Dessert Cups: An Irresistible No-Bake Treat
If you’re craving a quick, delicious, and comforting dessert, these Caramel Apple Dessert Cups are the answer. Combining warm, cinnamon-spiced apples with creamy whipped topping, crunchy granola, and a decadent drizzle of caramel, this no-bake dessert is as satisfying as it is easy to prepare. Perfect for weeknight treats, fall gatherings, or last-minute dessert emergencies, this layered delight brings the cozy flavor of caramel apples into every bite—without the hassle of baking.
Why You’ll Love These Caramel Apple Dessert Cups
✅ No baking required
✅ Quick prep time – under 15 minutes
✅ Kid-friendly and party-ready
✅ Customizable with your favorite toppings
✅ Perfect balance of textures and flavors
Ingredients You’ll Need
To make 4–6 dessert cups, gather the following:
- 2 large apples, diced (Honeycrisp, Fuji, or Granny Smith work best for flavor and texture)
- 1 teaspoon cinnamon
- 1 cup (240ml) caramel sauce, store-bought or homemade
- 1 cup (240ml) whipped cream or whipped topping
- ½ cup (60g) granola (or crushed graham crackers as an alternative)
- Optional toppings:
- Chopped nuts (walnuts, pecans)
- Mini chocolate chips
- Sea salt flakes for a gourmet touch
How to Make Caramel Apple Dessert Cups
Step 1: Prepare the Apples
Dice the apples into small bite-sized cubes. You can peel them for a softer texture or leave the skin on for added color and fiber.
Place the diced apples in a skillet or saucepan over medium heat. Sprinkle with 1 teaspoon cinnamon and sauté for 5–7 minutes, until slightly softened but still holding their shape.
🔥 Pro Tip: Want extra flavor? Add a teaspoon of brown sugar or a splash of apple juice while cooking the apples.
Step 2: Cool the Apples
Remove the apples from heat and allow them to cool slightly before assembling your cups. You don’t want the warm apples to melt the whipped cream immediately.
Step 3: Layer the Dessert Cups
Using small mason jars, parfait glasses, or dessert bowls, start layering:
- Bottom Layer: A spoonful of granola or crushed graham crackers for crunch.
- Second Layer: A generous scoop of cinnamon-spiced apples.
- Third Layer: A layer of whipped cream or topping.
- Fourth Layer: Drizzle with caramel sauce.
Repeat the layers one more time, depending on your glass size.
Step 4: Add Final Touches
Top each dessert cup with:
- A final drizzle of caramel
- Optional chopped nuts for crunch
- A few chocolate chips for added richness
- A pinch of sea salt flakes to enhance the caramel flavor
Step 5: Serve and Enjoy
These dessert cups are best served immediately for maximum crunch and texture contrast. However, you can prep the components ahead of time and assemble right before serving.
Serving Ideas and Variations
Make it your own with these creative twists:
- Apple Pie Vibes: Add a pinch of nutmeg and clove to the apples while cooking.
- Cheesecake Twist: Add a layer of sweetened cream cheese or vanilla pudding.
- Healthy Version: Use Greek yogurt instead of whipped cream, and reduce the caramel sauce.
- Fall Feast Favorite: Serve warm apple mixture over vanilla ice cream for a quick apple pie sundae.
Storage Tips
If you want to prep ahead:
- Cooked apples can be stored in an airtight container in the fridge for up to 3 days.
- Keep granola separate to avoid sogginess.
- Assemble cups just before serving for best texture.
Why These Dessert Cups Work
- Sweet & Salty Combo: Caramel and sea salt are a match made in heaven.
- Balanced Textures: Crunchy granola + soft apples + creamy topping = perfect bite.
- Flavor Depth: Cinnamon-spiced apples create that classic autumn warmth.
- Easy & Elegant: They look fancy, but require zero baking skills.
Conclusion
These Caramel Apple Dessert Cups are a simple yet decadent treat that brings the cozy taste of fall to your table all year round. Whether you’re entertaining guests, prepping for a potluck, or just indulging after dinner, this no-bake dessert delivers incredible flavor and satisfaction in just minutes.
It’s the perfect way to elevate apples—and impress without stress.