How to Preserve Meat and Rice in Jars: A Long-Lasting, Delicious Homemade Canned Meal
In today’s world of fast-paced living and rising food prices, preserving meat and rice in jars has reemerged as a time-tested, efficient, and tasty solution for meal prep, emergency storage, and off-grid living. This homemade canned meal isn’t just practical—it’s also deeply flavorful, customizable, and safe when done right. Whether you’re stocking up for tough times, planning meals for camping or travel, or simply want to simplify weeknight dinners, this method delivers on every front.
Why Jar-Preserving Meat and Rice Is the Ultimate Meal Prep Hack
Preserving meat and rice in jars creates shelf-stable, ready-to-eat meals that can last up to 12 months or more without refrigeration. Thanks to natural preservation methods—salt, vinegar, and heat—the resulting jars are not only safe but also rich in flavor, tender in texture, and deeply satisfying.
Benefits of Jar-Canned Meat and Rice:
- No artificial preservatives
- Long shelf-life (up to a year)
- Space-saving storage
- Ready in minutes—just reheat and serve
- Nutrient-dense and hearty
- Customizable with different meats, grains, and vegetables
Essential Ingredients and Equipment for Canning Meat and Rice
To create this homemade canned meal, you’ll need the following:
Ingredients:
- 1.3 kg beef neck (or substitute pork shoulder/fatty cut)
- 2 medium onions, finely chopped
- 2 medium carrots, diced
- 800g rice (short or medium-grain preferred)
- Salt – 1 tsp per kg of meat
- Black pepper – to taste
- 1 tsp sweet paprika
- 1 tsp dried spice mix (optional)
- Vegetable oil – for browning meat
- Boiling water
- 9% vinegar – 1 tbsp per jar
Equipment:
- Sterilized jars with lids (0.7-liter recommended)
- Large pot with lid
- Clean towel or cloth
- Ladle and funnel (optional but useful)
- Cutting board and sharp knife
Step-by-Step Instructions to Preserve Meat and Rice in Jars
1. Choose and Cut the Meat
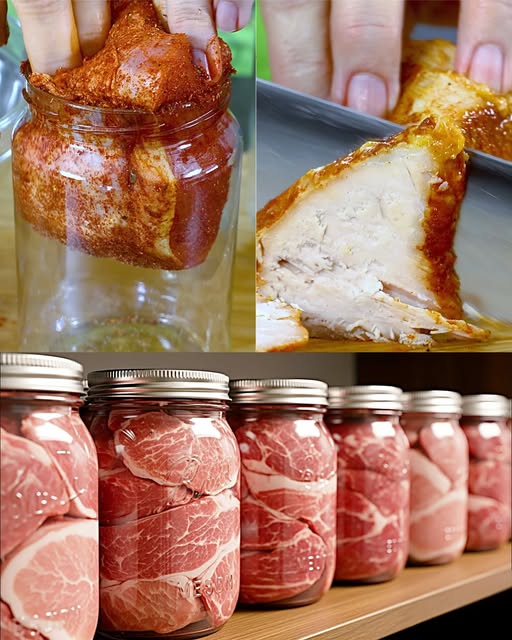
Select a fatty cut like beef neck or pork shoulder—fat enhances flavor and preserves moisture. Dice into walnut-sized chunks to fit neatly in jars.
2. Sear the Meat for Flavor
Heat vegetable oil in a pan and brown the meat until golden. This seals in juices and adds deep umami flavor.
3. Add Aromatics: Onion and Carrot
Once the meat is browned, add finely chopped onions. Sauté until golden, then stir in diced carrots. Cook until the vegetables soften.
4. Season the Mixture
Add your spices:
- 1 tsp salt
- Black pepper to taste
- 1 tsp sweet paprika
- Optional spice mix (e.g., thyme, bay leaf, garlic powder)
Stir thoroughly and let the flavors meld for a few minutes.
5. Prepare and Wash the Rice
Rinse the rice in cold water until it runs clear. This is crucial—it removes starch that can cause clumping or spoilage in jars.
Layering and Filling the Jars
6. Assemble in Sterilized Jars
Use clean, dry 0.7-liter jars and layer the ingredients as follows:
- Bottom layer: 3 tbsp of washed rice
- Middle: A heaping spoon of meat and vegetable mixture
- Next: Another layer of rice
- Top: Final spoonful of meat mixture
- Final rice layer: Top off with more rice, leaving 2 fingers’ space from the top
This structured layering allows even cooking and a visually appealing result.
7. Add Boiling Water and Vinegar
Carefully pour boiling water into each jar until the ingredients are fully submerged. Then add 1 tbsp of 9% vinegar to each jar. This not only aids preservation but adds a pleasant tang.
Sealing and Cooking the Jars
8. Seal the Jars Properly
Wipe the jar rims clean with a damp cloth to ensure a tight seal. Screw on clean, undamaged lids until firmly secured—but not overly tight.
9. Water Bath Cooking
Place a clean towel at the bottom of a large pot to prevent jar breakage. Arrange the jars snugly and pour hot water until it reaches the neck of the jars.
10. Cook for 4 Hours
Bring to a gentle boil, then simmer for 4 hours. Replenish water as it evaporates. This prolonged simmering simulates pressure cooking and ensures:
- Meat becomes tender
- Rice fully cooks
- Air is forced out of the jar, creating a vacuum seal
Cooling, Checking, and Storing
11. Gradual Cooling
Once done, turn off the heat and allow the jars to cool naturally in the pot or under a towel. Do not open or shake them.
12. Check the Seals
After cooling:
- Press the lid center—if it’s concave and doesn’t pop, it’s sealed.
- If it pops or feels loose, refrigerate and use within 3 days.
13. Store in a Cool, Dark Place
Properly sealed jars can be safely stored for up to 12 months in a pantry, basement, or cupboard.
How to Use Your Preserved Meal
When you’re ready to eat, simply:
- Open the jar
- Pour into a saucepan and reheat, or microwave in a bowl
- Serve with fresh herbs, a side salad, or pickled vegetables
These jars are perfect for:
- Quick weekday lunches
- Travel meals
- Emergency food storage
- Camping or outdoor adventures
Why This Preservation Method Works
✔ Salt and Vinegar – Natural Preservatives
Salt slows microbial growth. Vinegar creates an acidic environment that prevents dangerous bacteria, especially Clostridium botulinum.
✔ Fat and Juices Create a Seal
As the jars cook, fat and natural juices rise, sealing the top layer and protecting the contents from oxygen and spoilage.
✔ Simulated Pressure Cooking
Four hours of boiling achieves a level of heat deep enough to destroy harmful bacteria, making this method safe and reliable, even without a pressure canner.
Safety Tips for Home Canning
- Always use clean jars and lids
- Don’t reduce cooking time
- Never skip vinegar
- Discard any jar with bulging lids, leakage, or foul smell
- Label each jar with the date of preservation
Conclusion: Traditional Preservation with Modern Convenience
Preserving meat and rice in jars combines old-world wisdom with modern practicality. It’s a reliable method that produces rich, comforting meals with minimal effort and zero refrigeration.
This method not only saves time and money but also gives you the satisfaction of knowing exactly what’s in your food—no additives, no chemicals, just pure homemade nourishment.
Stock your shelves with these delicious jars, and enjoy peace of mind, convenience, and real flavor—all year long.