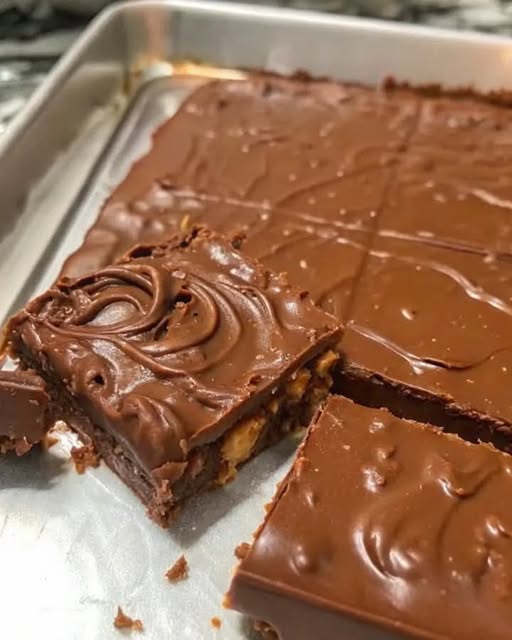
My Mom’s Fudge (Extremely Detailed Step-by-Step Version)
This is a classic homemade fudge recipe made with simple ingredients that, when combined correctly, produce a smooth, rich, chocolatey treat. This version uses marshmallow fluff and chocolate chips, creating a no-fail, beginner-friendly fudge that firms up beautifully in the fridge. It’s ideal for holidays, gifts, or any time you want a nostalgic dessert.
Ingredients with Detailed Descriptions
- ½ cup unsalted butter (1 stick)
- Adds fat, richness, and helps melt and bind the ingredients. Unsalted butter allows you to control the salt level precisely.
- 2 cups granulated sugar
- Provides sweetness and structure. When boiled with evaporated milk, it forms the base of the fudge.
- ⅔ cup evaporated milk
- This is not the same as sweetened condensed milk. It’s unsweetened, shelf-stable milk that has had about 60% of the water removed. It helps dissolve the sugar and creates a creamy texture.
- 1¾ cups semi-sweet chocolate chips (10–12 ounces)
- These melt into the hot mixture to form the chocolate base. Semi-sweet gives a rich, balanced flavor without being overly sweet.
- 7 ounces marshmallow fluff (1 jar)
- Acts as a stabilizer and gives the fudge its smooth, slightly chewy texture. It replaces the traditional use of sugar syrup and makes the recipe more forgiving.
- 1 tablespoon vanilla extract
- Adds depth and enhances all the chocolatey flavors. Use real vanilla extract for best results.
Equipment Needed
- 1 medium saucepan (3-quart size recommended)
- Whisk or silicone spatula
- Measuring cups and spoons
- Heatproof rubber spatula (for stirring)
- Parchment paper or nonstick spray
- 8×8 or 9×9 inch square pan (for setting the fudge)
- Refrigerator space for chilling
Step-by-Step Instructions (In Painful Detail)
Step 1: Prepare the Pan
- Before you begin cooking, line an 8×8 inch square pan with parchment paper. You can also grease the pan with nonstick spray or butter if you prefer.
- Make sure the paper goes up the sides for easy removal later.
Step 2: Combine the First Three Ingredients
- Place a medium saucepan on the stovetop over medium heat.
- Add ½ cup unsalted butter to the pan. Let it melt completely.
- Add 2 cups granulated sugar to the melted butter.
- Add ⅔ cup evaporated milk to the pan.
- Whisk all three ingredients together continuously until they’re fully combined and smooth.
Step 3: Bring to a Boil
- Increase the heat slightly to medium-high. Continue whisking constantly to prevent burning.
- Watch the mixture closely. Once it begins to boil (you will see bubbles forming across the surface), start a timer.
Step 4: Boil for 5 Minutes
- Reduce the heat to maintain a steady, rolling boil.
- Let the mixture boil for exactly 5 minutes, stirring frequently (about every 20–30 seconds) to keep it from sticking or scorching on the bottom.
- After 5 minutes, remove the pan from the heat. Turn off the burner.
Step 5: Add Chocolate Chips
- Immediately pour in 1¾ cups semi-sweet chocolate chips.
- Stir quickly and thoroughly with a rubber spatula or whisk. The residual heat will melt the chocolate.
- Continue stirring until the mixture is completely smooth and no visible chips remain.
Step 6: Add Marshmallow Fluff and Vanilla
- Spoon in 7 ounces of marshmallow fluff. It may be sticky—use a greased spoon or rubber spatula.
- Add 1 tablespoon vanilla extract to the pot.
- Stir until the fluff is fully incorporated and the mixture is completely smooth, glossy, and uniform in texture.
Step 7: Transfer to the Pan
- Pour the fudge mixture into your prepared 8×8 pan.
- Use a spatula to smooth the top so it’s level and evenly spread into the corners.
Step 8: Chill the Fudge
- Carefully place the pan in the refrigerator.
- Chill for 2 to 4 hours until the fudge is firm and holds its shape when cut.
Serving Suggestions
- Hot Cocoa: Serve small squares of fudge with hot cocoa to double down on cozy, creamy vibes.
- Vanilla Ice Cream: Place a square on warm brownies or cold ice cream for a decadent dessert.
- Fresh Berries: Serve with strawberries or raspberries to add a tart, fruity contrast.
- Dark Roast Coffee: The bitterness of dark coffee perfectly complements the rich sweetness of the fudge.
Frequently Asked Questions (FAQ)
Can I double this recipe?
Yes. Double each ingredient and use a 9×13 inch pan. Cooking time remains about the same, but be sure to stir constantly and ensure everything melts evenly.
How do I prevent the fudge from crumbling?
- Do not overcook the sugar mixture.
- Use fresh ingredients.
- Store fudge in an airtight container to keep it from drying out.
How long does fudge last?
When stored properly in an airtight container in the refrigerator, Mom’s Fudge can last several weeks without any loss of flavor or texture.
Can I freeze this fudge?
Yes. Wrap tightly in plastic wrap and then foil. Store in a freezer-safe container. Freeze for up to 3 months. Thaw in the refrigerator overnight before serving.
Storage Tips
- Store in an airtight container in the refrigerator.
- Use wax paper or parchment between layers to prevent sticking.
- Let it come to room temperature before serving if you prefer a softer texture.
Final Thoughts: Simple, Reliable, Nostalgic
Mom’s Fudge is a no-stress, crowd-pleasing treat that you’ll want to make again and again. Whether you’re preparing it for a holiday, a birthday, or simply to satisfy a chocolate craving, this recipe always delivers. Its smooth, creamy texture and deep chocolate flavor will take you back to the warm, delicious memories of family kitchens and festive tables.