How to Make Homemade Nesquik – A Rich, Chocolatey Treat You Can Trust
Skip the store-bought mixes and treat yourself to a delicious, homemade version of Nesquik that’s just as flavorful—without the preservatives or additives. This DIY Nesquik recipe is made from just four pantry staples, comes together in minutes, and can be stored for weeks. Whether you’re making a quick chocolate milk for the kids or a nostalgic treat for yourself, this homemade Nesquik is sure to satisfy every craving.
Ingredients for the Best Homemade Nesquik Mix
Creating this chocolatey drink mix at home requires only a few simple ingredients, most of which you probably already have:
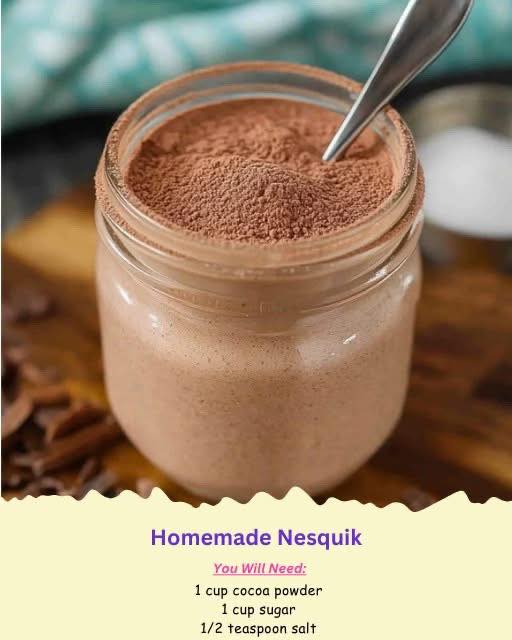
- 1 cup cocoa powder (unsweetened)
- 1 cup granulated sugar
- ½ teaspoon salt
- 1 teaspoon vanilla extract
These core ingredients create a perfectly sweet, slightly salty, and deeply rich chocolate powder that mirrors the classic Nesquik flavor while offering a cleaner, customizable version.
Step-by-Step Instructions: How to Make Homemade Nesquik
1. Combine the Dry Ingredients
In a medium-sized mixing bowl, add:
- 1 cup of cocoa powder
- 1 cup of sugar
- ½ teaspoon of salt
Using a whisk, blend these dry ingredients together thoroughly. The key is to eliminate any lumps and ensure a uniform mixture for consistent flavor in every spoonful.
Pro Tip: Use high-quality Dutch-processed cocoa powder for a smoother, more intense chocolate flavor.
2. Mix in the Vanilla Extract
Slowly drizzle 1 teaspoon of vanilla extract into the bowl while continuing to stir. The vanilla will lightly dampen the mix, creating small clumps—this is normal. Keep mixing until the vanilla is fully incorporated and the powder is mostly even in texture.
Optional Tip: If the mixture clumps too much, use a food processor to pulse it into a fine powder.
3. Store Your Homemade Nesquik
Transfer the completed mix into an airtight container—a mason jar or sealed glass container works best. Store it in a cool, dry place for up to 3 months.
How to Make Chocolate Milk Using Homemade Nesquik
To whip up a glass of rich chocolate milk:
- Pour 1 cup of milk (dairy or non-dairy) into a glass.
- Add 2 tablespoons of your homemade Nesquik mix.
- Stir vigorously until the powder is completely dissolved.
Enjoy instantly, or serve over ice for a refreshing chocolate drink.
Dairy-Free Option: Almond, oat, soy, or coconut milk pair beautifully with this mix for a vegan-friendly version.
Benefits of Making Nesquik at Home
1. Fewer Additives: Unlike commercial mixes, this homemade version contains no preservatives, artificial flavors, or unnecessary thickeners.
2. Customizable Sweetness: Adjust the sugar level to your taste. For a low-sugar version, reduce the sugar by half or substitute with a natural sweetener like stevia, erythritol, or monk fruit.
3. Richer Flavor: High-quality cocoa and fresh vanilla extract give this mix an unbeatable depth of flavor that’s far more satisfying than prepackaged alternatives.
4. Kid-Friendly & Allergy Safe: When made at home, you control all the ingredients—perfect for families with food sensitivities or allergies.
Creative Ways to Use Homemade Nesquik
This chocolate mix isn’t just for drinks. Here are more delicious ways to enjoy it:
- Chocolate Pancakes: Add 2 tablespoons to your pancake batter for a chocolate twist.
- Hot Cocoa: Mix with hot milk for a cozy, winter-friendly drink.
- Smoothies: Add to banana or peanut butter smoothies for a chocolatey boost.
- Baking: Use as a dry ingredient in muffins, cookies, or brownies.
- Ice Cream Topping: Sprinkle over vanilla or chocolate ice cream.
Nutritional Info (Per Serving)
Assuming 2 tablespoons of mix per 1 cup of milk (excluding milk values):
- Calories: ~90
- Sugar: ~12g
- Fat: ~2g (depending on cocoa type)
- Protein: ~1g
You can reduce these values by using less sugar or opting for unsweetened plant-based milk.
Tips for the Perfect Homemade Nesquik
- Sift the cocoa powder before mixing to reduce clumps.
- Use powdered vanilla instead of extract to keep the mix dry.
- Add a pinch of cinnamon or espresso powder to intensify the flavor.
- Mix with warm milk first, then chill for faster dissolving and smoother results.
FAQ About Homemade Nesquik
Can I use brown sugar instead of white sugar?
Yes, but it will change the flavor profile to a slightly caramelized one. It’s a delicious twist if you enjoy deeper sweetness.
Is it shelf-stable?
Yes, as long as it’s stored in an airtight container and kept dry, it will last for several months.
Why does it clump when I add milk?
Natural cocoa powder doesn’t dissolve as easily as processed mixes. Stir vigorously or mix a small amount with warm water first, then add to milk.
Can I double the recipe?
Absolutely! It scales beautifully, making it perfect for gifting or bulk storage.
Final Thoughts: Better Than Store-Bought Every Time
Making homemade Nesquik is simple, satisfying, and seriously delicious. You control the quality, tailor the flavor, and skip all the unnecessary extras. Once you taste the real chocolate depth and silky smooth finish of this DIY version, you’ll never go back to the packaged kind again. It’s the perfect pantry staple for families, chocolate lovers, and anyone who values a touch of homemade goodness in their daily routine.