Introduction
If you’ve ever wondered what makes homemade condensed milk caramel so irresistible, you’re not alone. More and more people are turning to this slow cooker method to create that rich, golden, creamy caramel, and it’s no mystery why. Unlike the traditional stovetop method, slow-cooking your condensed milk gives it an incredible smoothness and deep caramel flavor without the constant watch. Plus, it’s almost foolproof! Whether you’re preparing caramel tarts for Christmas or simply looking for a new treat to enjoy, this method is a game-changer.
What Is Condensed Milk Caramel?
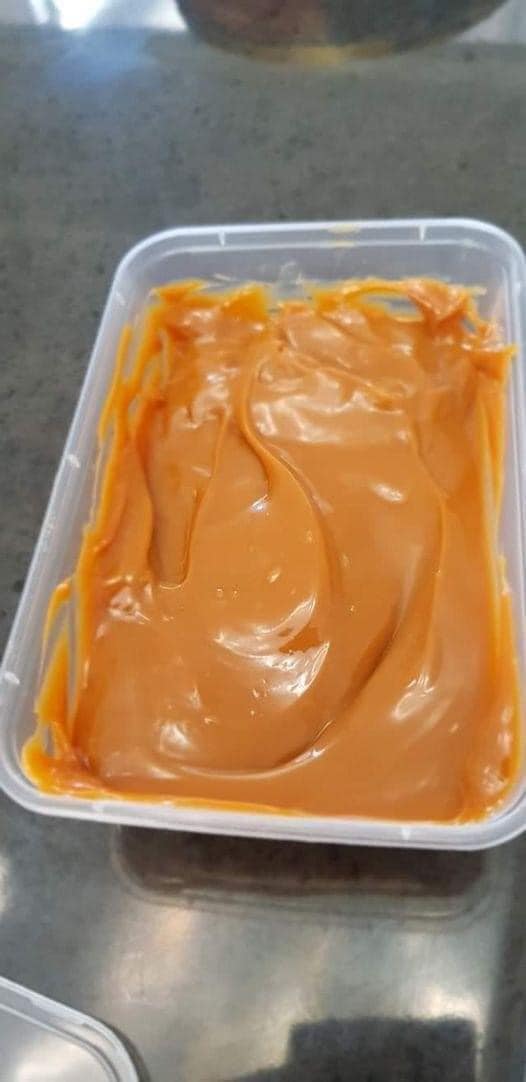
Condensed milk caramel, also known as “dulce de leche,” is simply caramelized sweetened condensed milk. With its creamy, thick texture and rich sweetness, it’s perfect for adding to desserts, spreading on toast, or just eating straight from the spoon.
Why Make Caramel in a Slow Cooker?
Using a slow cooker for caramelizing condensed milk is hassle-free and safer than the stovetop method. You don’t have to monitor it closely, and the low, steady heat ensures even caramelization, giving you perfect results with minimal effort. Once you try it this way, it’ll be hard to go back to stovetop.
Ingredients Needed
To make slow cooker condensed milk caramel, you only need:
- A can of sweetened condensed milk
- Water to keep the can submerged
- A slow cooker
Pro Tip: Ring-pull cans are okay to use, but always place them ring-pull side down in the slow cooker to avoid accidental opening.
The Slow Cooker Method: Step-by-Step
- Preparation: Place your unopened can of sweetened condensed milk into the slow cooker, setting it on its side or ring-pull end down.
- Water Level: Fill the slow cooker with enough water to fully cover the can by at least 2 inches.
- Cover: Put the lid on the slow cooker—no need for a tea towel or extra layers.
Setting the Slow Cooker Temperature
Depending on your preference, you can use the high or low setting. Both work well; it just depends on how much time you have:
- High Setting: Takes around 4-5 hours.
- Low Setting: Takes about 7-8 hours for a thicker, richer caramel.
How Long to Cook for the Perfect Texture
The cooking time influences the caramel’s thickness:
- 4 hours on High or 7 hours on Low: Results in a creamy, spreadable texture.
- 5 hours on High or 8 hours on Low: Yields a firmer, spoonable caramel for tarts and fillings.
Ensuring the Right Water Level
The water should always cover the can by at least two inches. This is crucial for even heating and preventing the can from overheating. Check the water level every hour or so, especially if you’re cooking on high, to make sure it hasn’t dropped.
Safety Tips When Handling Caramelized Cans
Once cooking is complete, allow the can to cool completely before opening it. The caramel is under pressure, and if it’s still hot, it could spurt out and cause burns. For best results, let the can sit in the slow cooker overnight, ensuring it cools fully and evenly.
Overnight Cooling and Its Benefits
Leaving the can to cool overnight in the slow cooker not only makes it safer to open but also enhances the caramel’s texture. By morning, you’ll have a rich, perfectly thick caramel that’s ready to use.
Checking Consistency Before Use
Once the can is completely cool, open it to reveal the caramel. It should have a glossy finish and a smooth, spreadable texture. If you prefer a thicker consistency, try cooking it on high for an additional 30 minutes to an hour.
Serving Suggestions: How to Use Your Caramel
Homemade caramel is a versatile treat. Here are some delicious ways to use it:
- Caramel Tarts: Fill tart shells with caramel and top with whipped cream or chocolate shavings.
- Drizzle on Ice Cream: Warm the caramel slightly and pour it over your favorite ice cream.
- Spread on Toast or Biscuits: Make a luxurious snack by spreading it on fresh toast or cookies.
- Eat It Straight from the Can: Trust us, it’s that good!
Benefits of Making Caramel at Home
Homemade caramel is free from preservatives and artificial flavors, unlike many store-bought versions. Plus, making it yourself allows you to control the texture, flavor, and quality, ensuring the best taste for all your treats.
Conclusion
Using the slow cooker to make condensed milk caramel is a true kitchen hack for caramel lovers. The process is simple, safe, and produces a luscious caramel that’s perfect for desserts or just savoring on its own. Once you’ve tried it, there’s a good chance you won’t go back to any other method!
FAQs
1. Can I use low-fat condensed milk for this recipe?
Yes, but keep in mind that it may affect the texture and flavor. Full-fat condensed milk usually yields a richer caramel.
2. How do I store leftover caramel?
Transfer it to an airtight container and refrigerate. It will last up to two weeks.
3. Can I double this recipe?
Yes, you can cook multiple cans at once, as long as they’re fully submerged in water.
4. Can I speed up the cooling process?
You could place the can in cold water after cooking, but it’s safest to let it cool overnight.
5. What should I do if the caramel is too thick?
If it’s thicker than you like, stir in a small amount of milk or cream until you reach your desired consistency.
